19 Easy DIY Christmas Picture Frames That Will Personalize Your Holiday
There’s something magical about a Christmas tree decorated with memories. While store-bought ornaments are beautiful, nothing compares to the warmth of a handmade picture frame holding a cherished family photo . The best part? These DIY projects aren’t just sentimental they’re also budget-friendly, beginner-friendly, and perfect for gifting. Whether you’re looking to create a keepsake ornament for the tree, a stunning piece of wall art, or a thoughtful present for a loved one, these 19 ideas will inspire you to get crafty this holiday season.
1: Vintage Gold Frame Ornaments
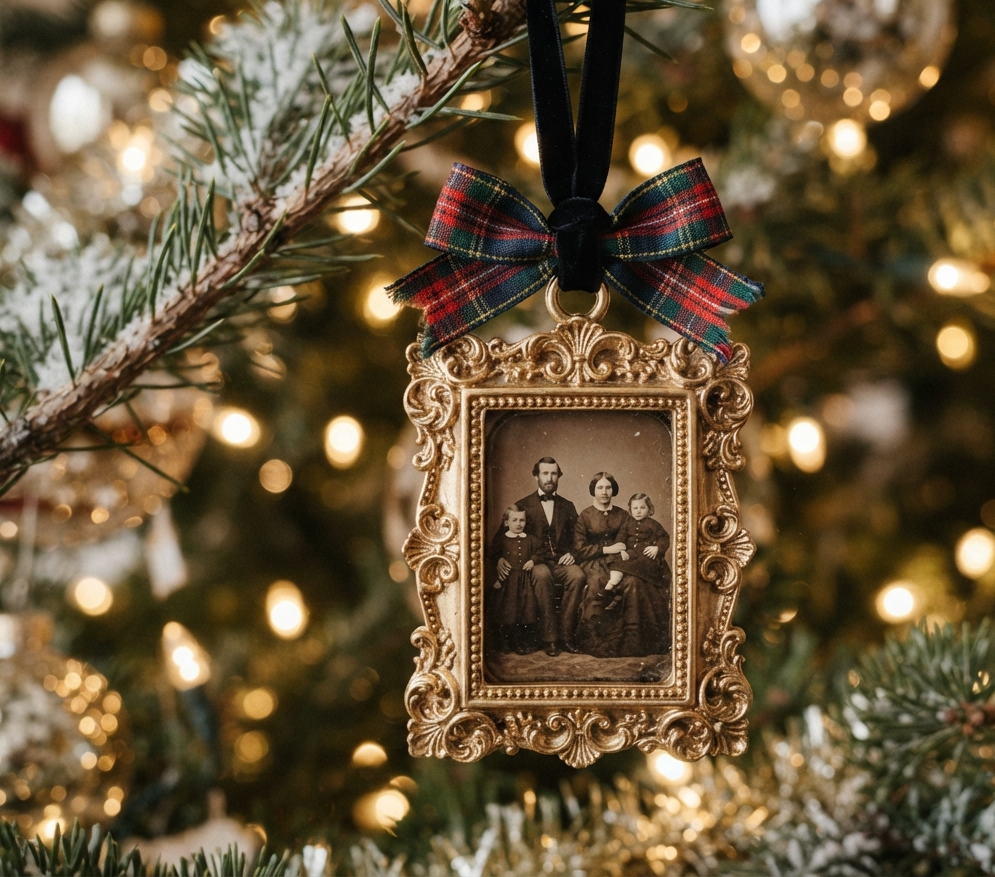
Nothing says “heirloom” quite like a tiny ornate gold frame hanging from your Christmas tree. These miniature frames feel rich and timeless, especially when paired with vintage-style photos . You can find small resin or metal frames at craft stores or thrift shops and transform them with gold paint. The contrast of gold over a dark base gives the frames an antique glow that looks far more expensive than it is .
Tips
- Use a gold metallic wax or rub-on paint for an authentic antique finish
- Print your photos in sepia tone or black and white for a nostalgic feel
- Attach a velvet ribbon loop to the back for an elegant hanger
2: Painted Striped Frame
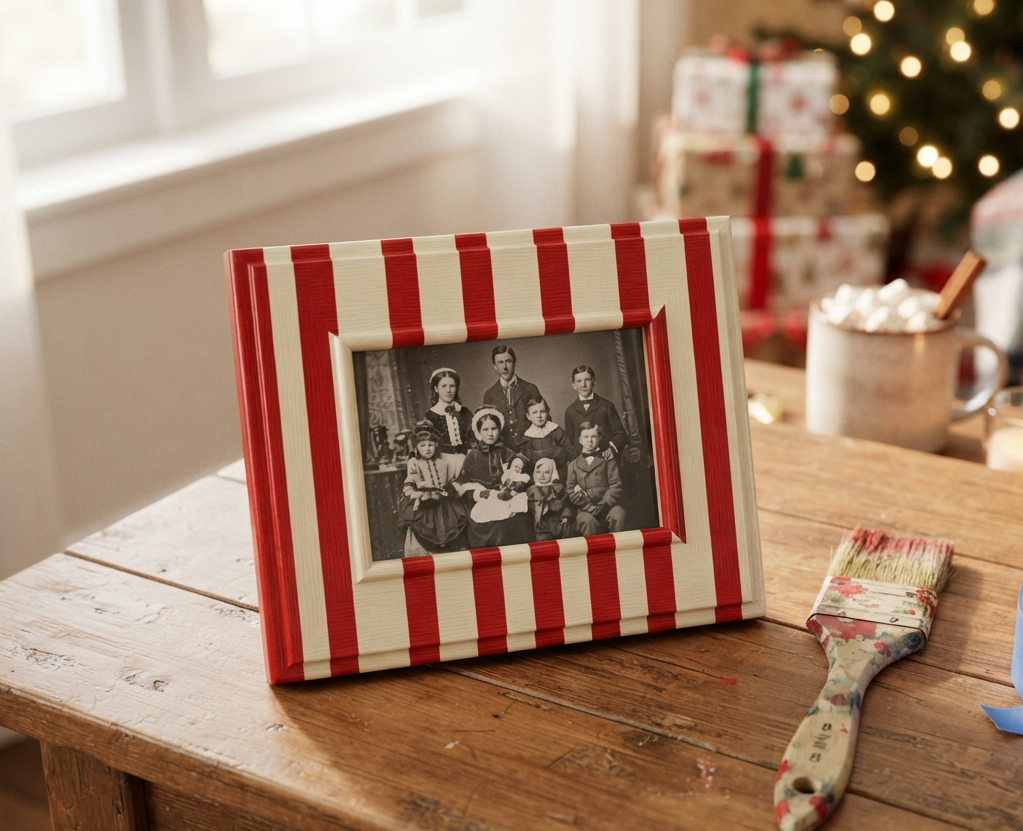
Give an old thrifted frame a fresh, contemporary look with a painted stripe pattern. This is a fantastic way to coordinate a frame with your holiday color scheme . Using painter’s tape (like Frog Tape), you can create crisp, clean stripes in alternating colors. This technique works best on wider, flatter frames with a smooth surface . For an extra special touch, paint the mount card inside the frame in the opposite colorway for a cool contrasting effect .
Tips
- Water down your paint slightly so it goes on smoothly and travels further
- Use the width of the tape as a guide for even spacing
- Seal your painted frame with a clear wax to protect the finish
3: Embroidery Hoop Photo Ornaments

Embroidery hoops are a fantastic and affordable alternative to traditional frames . They create a lovely, modern circular frame that looks beautiful on a tree or hanging in a window. The process is simple: stretch a piece of fabric (muslin works great) in the hoop, iron on your photo using printable heat transfer material, and trim the excess fabric from the back . The result is a clean, contemporary ornament that’s surprisingly durable.
Tips
- Use Canva to create a page of circular photos perfectly sized for 4″ hoops
- Choose photos with the subject centered to avoid awkward cropping
- Embellish the hoop with paint, glitter, or ribbon for extra personality
4: Thrifted Fabric Frame
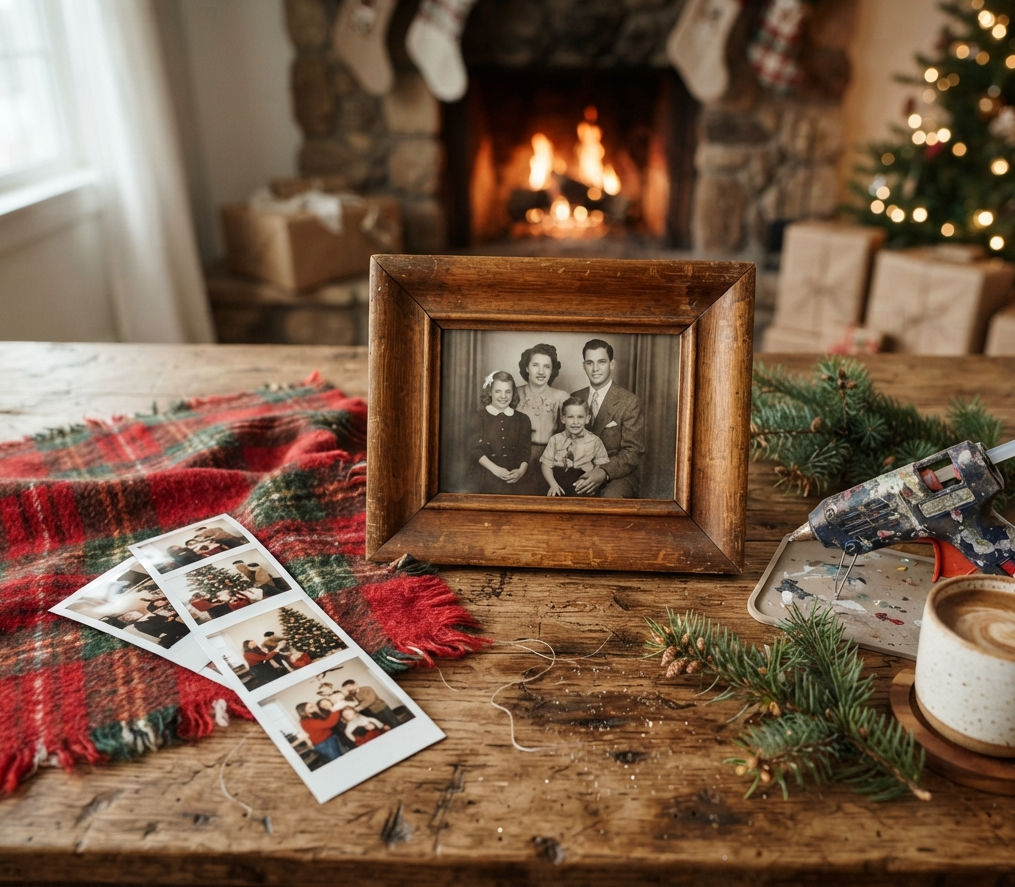
For a gift that’s both thoughtful and sustainable, head to your local thrift store. Find a frame with a nice shape and some character, then give it a cozy update with fabric . This DIY is incredibly simple: cut a piece of fabric (think plaid, linen, or any festive pattern) to fit the frame, glue it in place, and then arrange your photos Polaroids or photo booth strips work beautifully . It’s a fantastic way to upcycle and create a gift that feels truly personal .
Tips
- Look for fabric that complements the color of your frame
- You don’t need perfect edges the frame will hide them!
- This project is beginner-friendly and can be completed in minutes
5: Bauble Hanging Frame
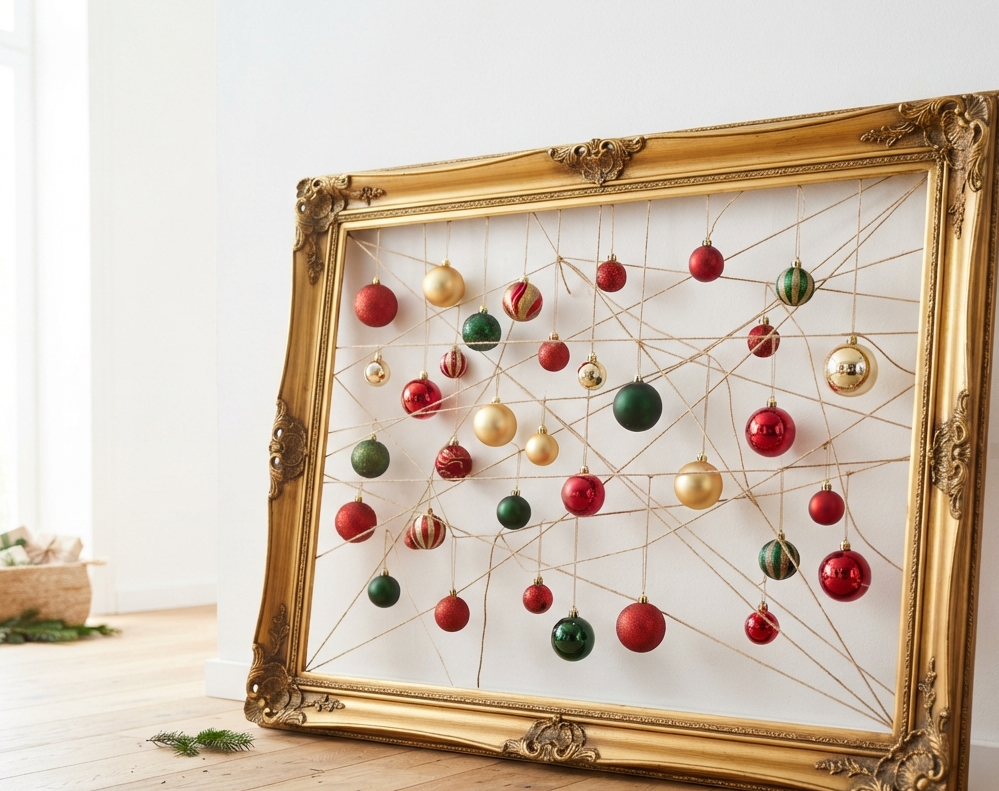
Turn an empty picture frame into a stunning piece of holiday wall art by hanging baubles from twine stretched across it . This is a brilliant way to repurpose extra ornaments and create a statement piece for your wall, mantel, or even as a photo backdrop for Christmas morning . The key is to vary the lengths of the twine so the baubles hang at different heights, creating depth and movement . The project is incredibly budget-friendly and can be completed for under $20 .
Tips
- Remove the glass and backing from the frame, leaving just the border
- Use a stapler to securely attach the crisscrossing twine to the back of the frame
- Mix bauble sizes, colors, and finishes for a dynamic look
6: Popsicle Stick Frames
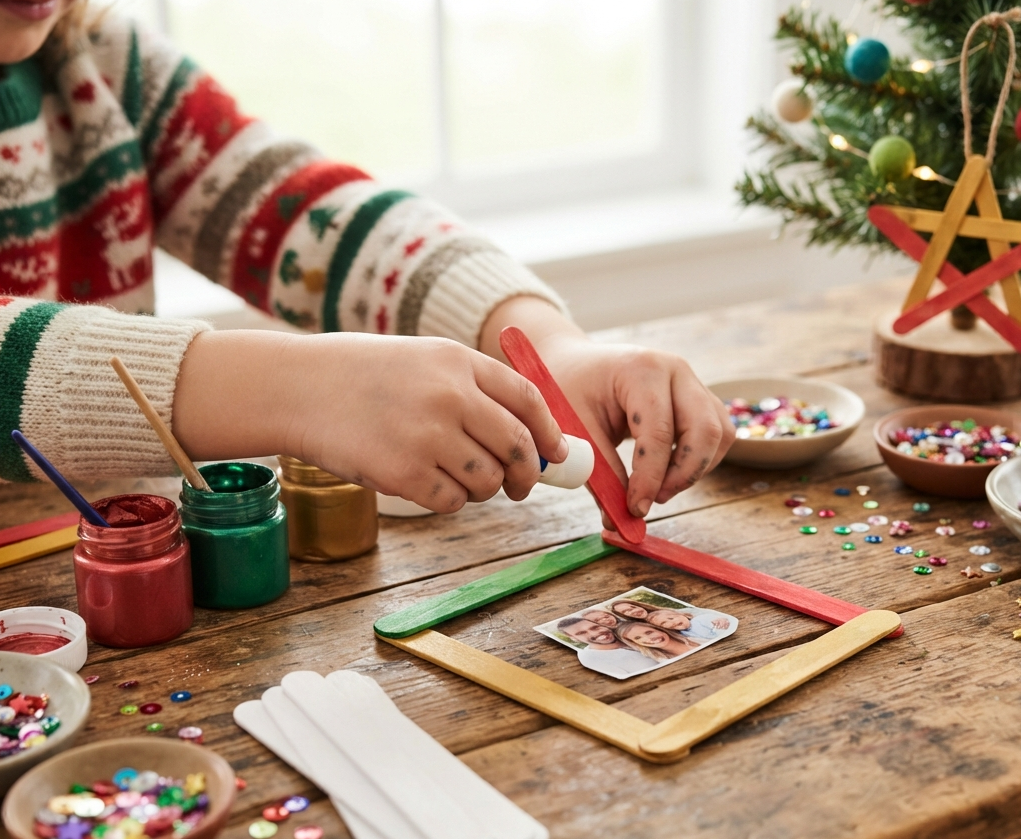
This classic kids’ craft is a wonderful way to get the whole family involved in holiday decorating. Arrange four popsicle sticks into a square, glue the corners, and let the kids paint them in festive colors like red, green, or gold . Then, glue a photo (or a drawing!) to the back and add a ribbon loop for hanging. It’s a simple, affordable, and heartwarming project that kids of all ages can enjoy .
Tips
- Decorate the sticks with glitter, sequins, or mini pom-poms before assembling
- Use a photo of the child making the ornament for a double-dose of sentimentality
- Let the paint dry completely before gluing the photo in place
7: Rustic Wood Slice Frames
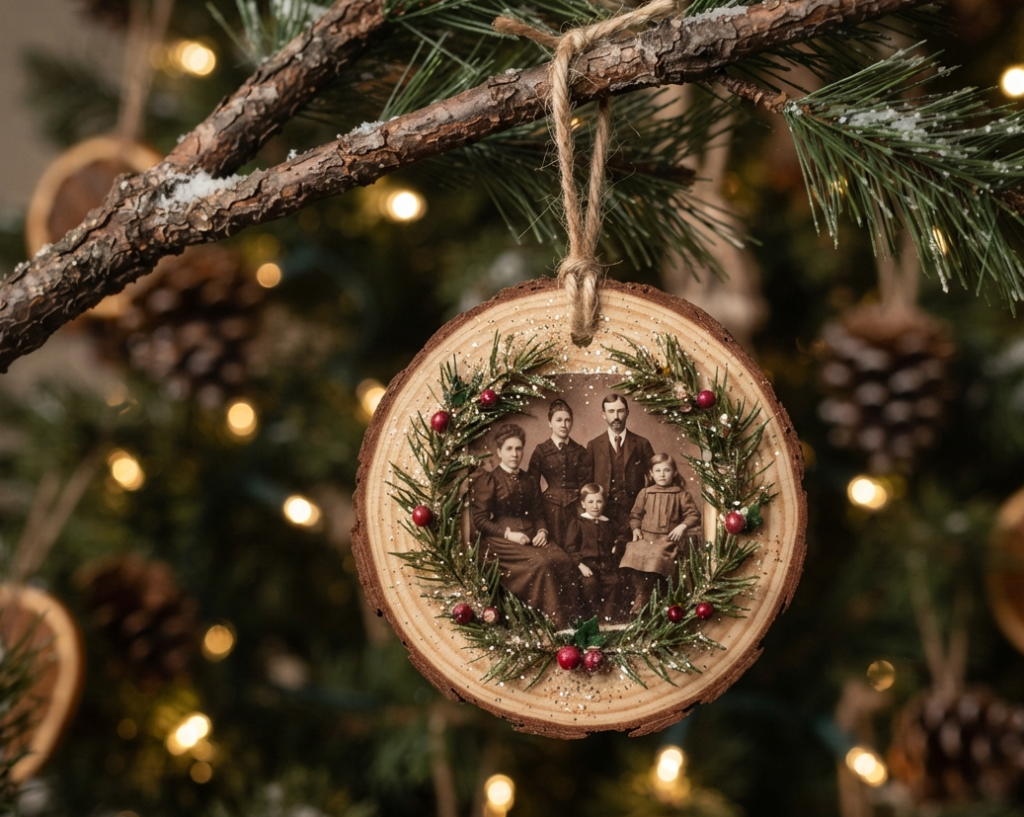
For a rustic, farmhouse-style ornament, look no further than a wood slice. These natural, earthy frames are perfect for capturing a cozy winter feel. The process is simple: sand a wood slice smooth, glue your photo (cut into a circle) to the center, and embellish the edges with miniature pine sprigs, berries, or a dusting of faux snow . Add a piece of twine to the top for hanging, and you have a charming, nature-inspired keepsake .
Tips
- Choose a wood slice that’s large enough to comfortably fit your photo
- For a more durable finish, seal the wood and photo with Mod Podge
- This style pairs beautifully with other natural materials like burlap and pinecones
8: Glitter Magic Frame
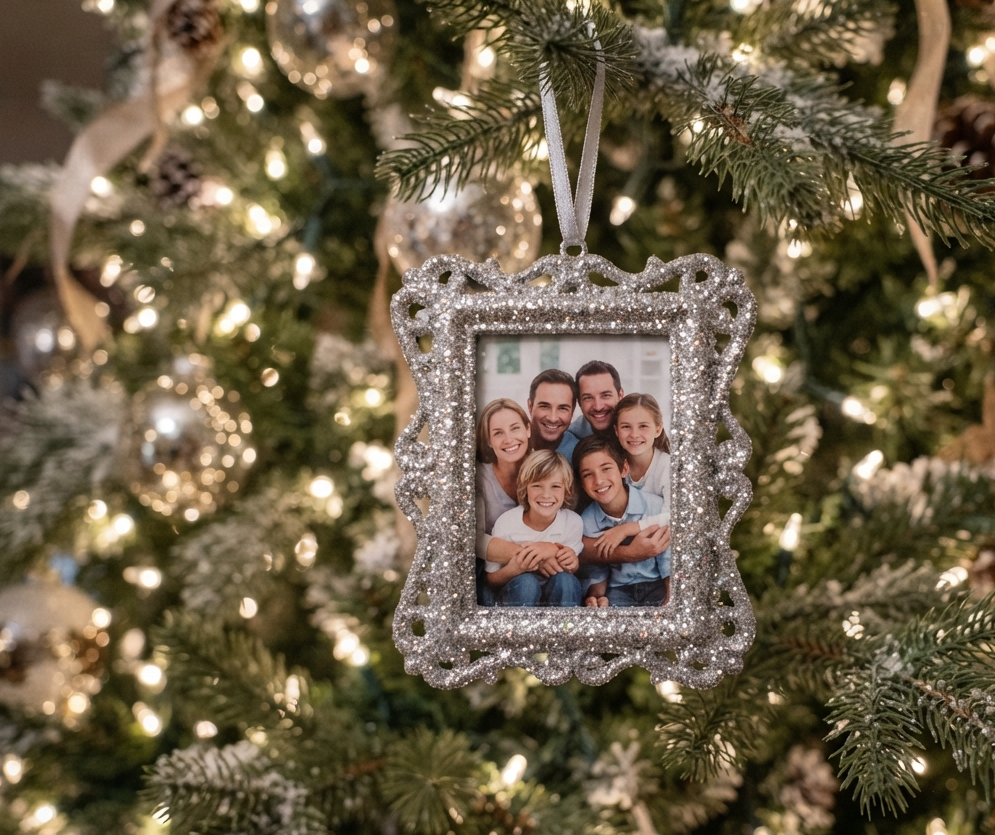
Sometimes a little sparkle is all you need to make a frame feel festive. You can apply glitter to an existing frame, or create a frame from cardboard specifically for this project . Adding glitter is straightforward: brush a layer of Mod Podge or white glue onto the frame, sprinkle with glitter, and let it dry . To prevent the dreaded glitter mess, seal it with a clear spray sealant or another layer of Mod Podge once it’s dry .
Tips
- Use a fine-grade glitter for a more elegant, sophisticated look
- For a more controlled application, paint the glue only on the areas you want to glitter
- Apply glitter over a large sheet of paper to easily catch and reuse the excess
9: Ribbon Wrapped Frame
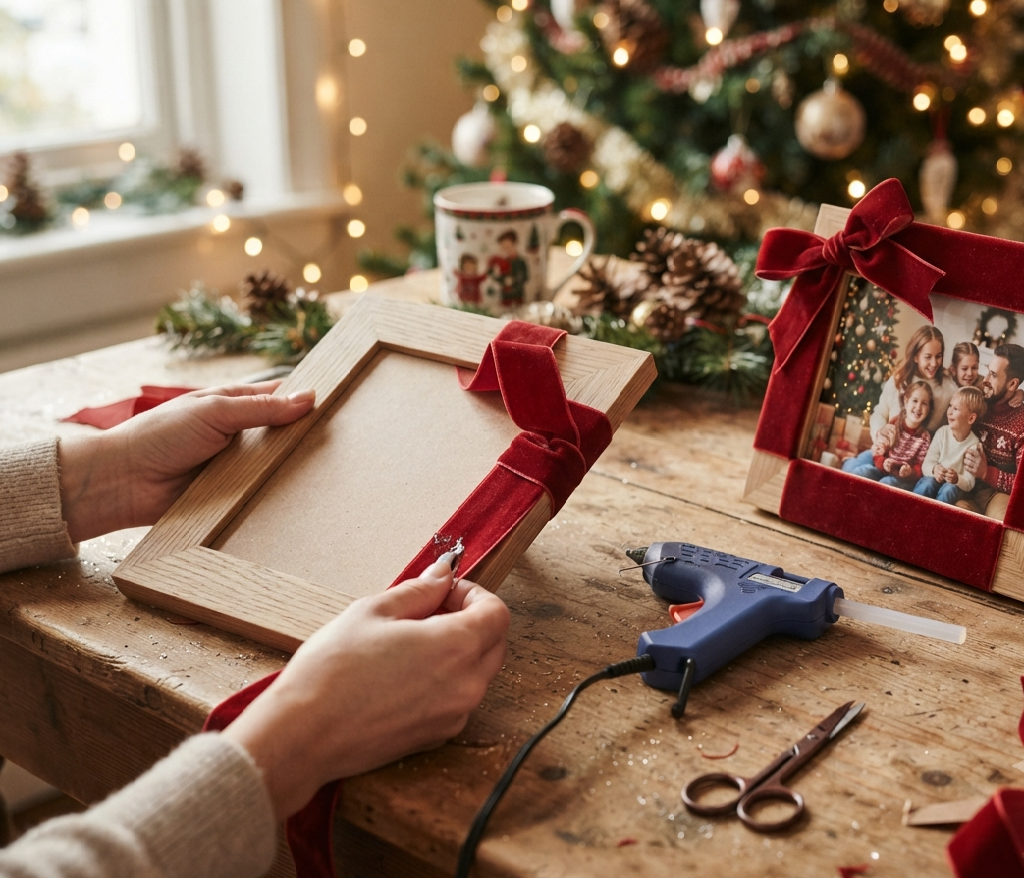
You can transform a plain frame into an elegant piece of holiday decor with a simple wrapping of festive ribbon. This is a great no-mess, no-paint project that’s perfect for a cozy evening in. Choose a beautiful velvet, plaid, or metallic ribbon and wrap it tightly around the frame . You can create a variety of looks, from a simple single wrap to more complex crisscross or spiral patterns. Finish it off by securing the ends on the back with a bit of hot glue.
Tips
- Use double-sided tape to temporarily hold the ribbon in place while you work
- Mix different widths and textures of ribbon for added depth
- This technique is perfect for quickly updating thrifted frames
10: Candy Cane Frame
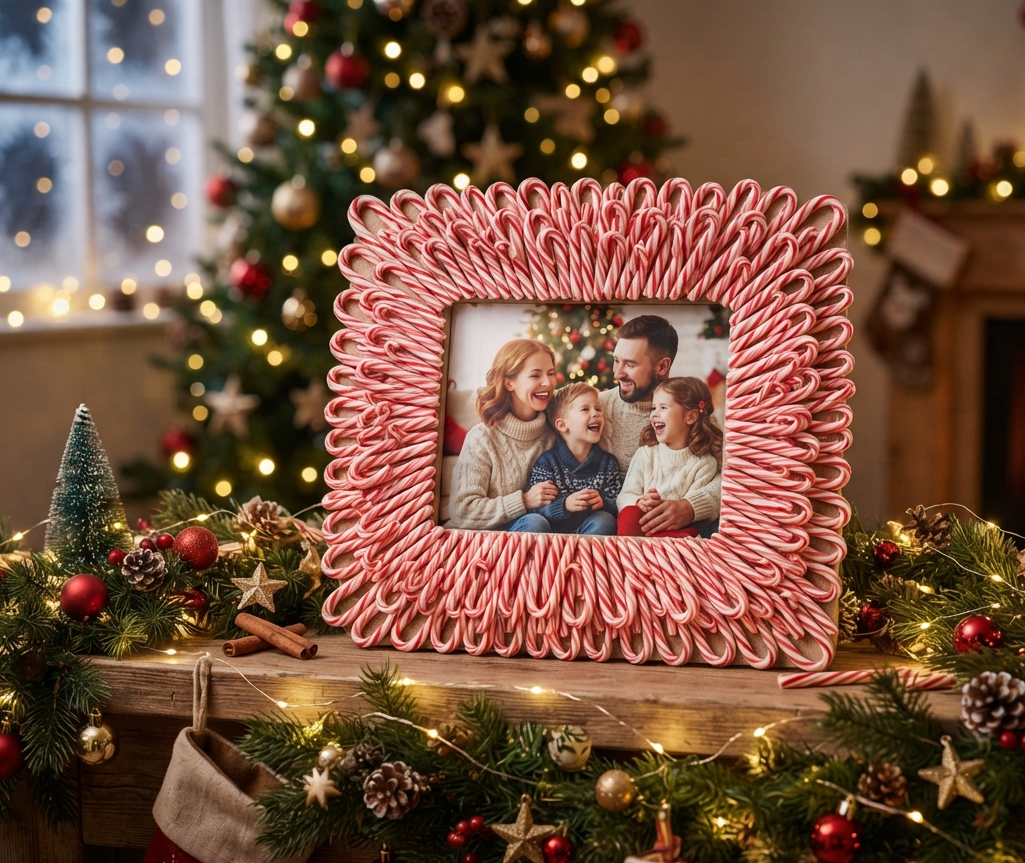
This whimsical idea is guaranteed to bring a smile to anyone’s face. Decorate the border of a picture frame with real or faux candy canes for a sweet, nostalgic touch . You can arrange them in a variety of ways: point them all in the same direction for a sunburst pattern, alternate them for a striped border, or create a frame-within-a-frame effect. It’s a fun, playful design that’s perfect for a kids’ room or a festive hot chocolate bar.
Tips
- Use hot glue to attach the candy canes to the frame
- If using real candy canes, keep them in their plastic wrappers to avoid sticky messes
- This is a wonderful project to do with children
11: Miniature Art Gallery Frames

Create a sophisticated, miniature art gallery on your tree by using tiny frames to hold miniature pieces of art . This is a wonderful way to showcase your own creativity or to frame beautiful images cut from magazines, art books, or vintage Christmas cards. You can even create a themed set of ornaments like a collection of famous paintings, birds, or botanical prints—for a truly curated look .
Tips
- Remove the glass from the frames to prevent glare
- Use double-sided tape to secure the artwork in the frame
- These tiny frames also make lovely year-round decor or fridge magnets
12: Starry Night Frame
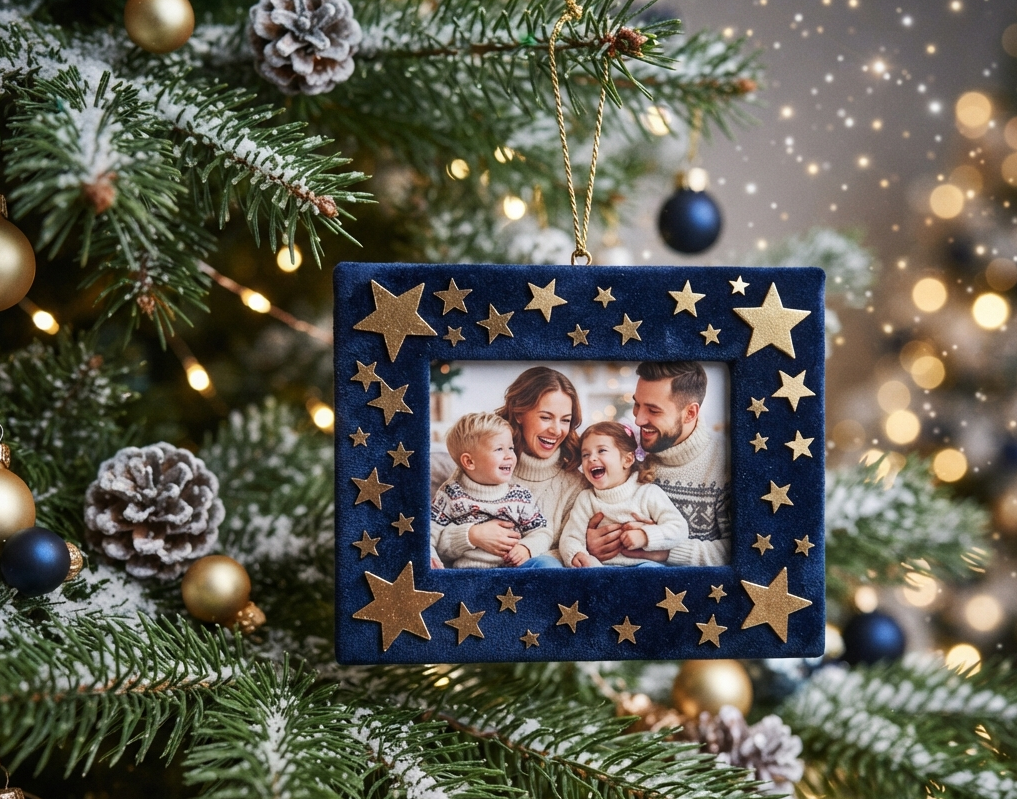
Create a celestial, magical feel by decorating a frame with star-shaped cutouts or decals . This is a lovely way to create a theme on your tree. You can paint the frame a deep navy blue, then attach silver or gold star stickers or cutouts to the frame itself. Place a photo of a beloved family member in the center, and you have an ornament that suggests they are the “star” of your holiday.
Tips
- You can find star-shaped stickers and cutouts at most craft stores
- For a more professional look, use a stencil and metallic paint
- This style pairs beautifully with other celestial-themed ornaments
13: Evergreen Garland Frame
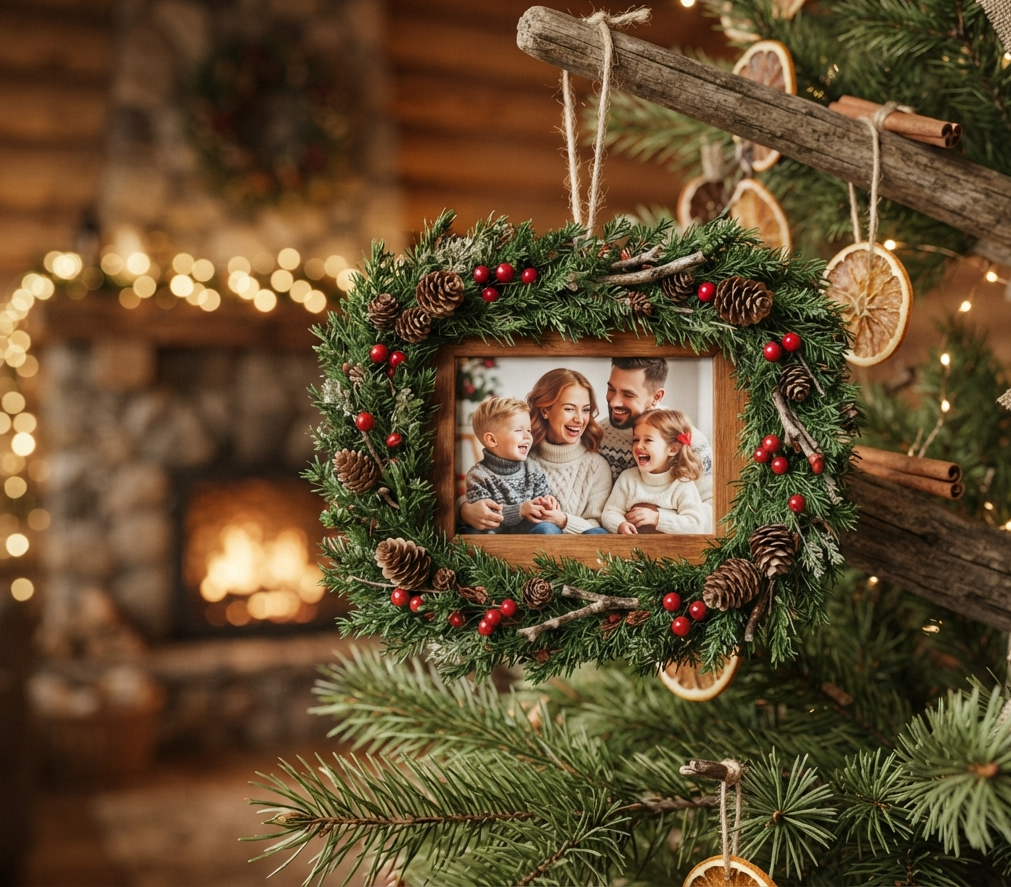
For a truly lush and festive look, wrap a picture frame in a garland of evergreen . You can use real greenery from your yard or high-quality faux garland. Simply wrap the garland around the frame, securing it with floral wire or hot glue. The result is a stunning, natural ornament that brings the freshness of the outdoors inside. It’s perfect for a rustic or farmhouse-style tree. You can also tuck in a few pinecones or berries for extra detail.
Tips
- If using real greenery, know that it will dry out over time but will still retain its charm
- Use a frame that’s thick and sturdy enough to support the weight of the garland
- Add a festive red bow at the top for a classic Christmas finish
14: Twinkling Lights Frame

Add a magical glow to your tree with a frame wrapped in a strand of twinkling fairy lights . This is a show-stopping ornament that’s guaranteed to catch the eye. You can use a small, battery-operated set of lights and carefully wrap them around the frame. The effect is like having a miniature light show on your tree.
Tips
- Use lights with a small wire that’s easy to manipulate around the frame
- Look for lights with a timer function for convenience
- This technique also works wonders on larger frames for wall art or a mantel display
15: Nature’s Touch Frame
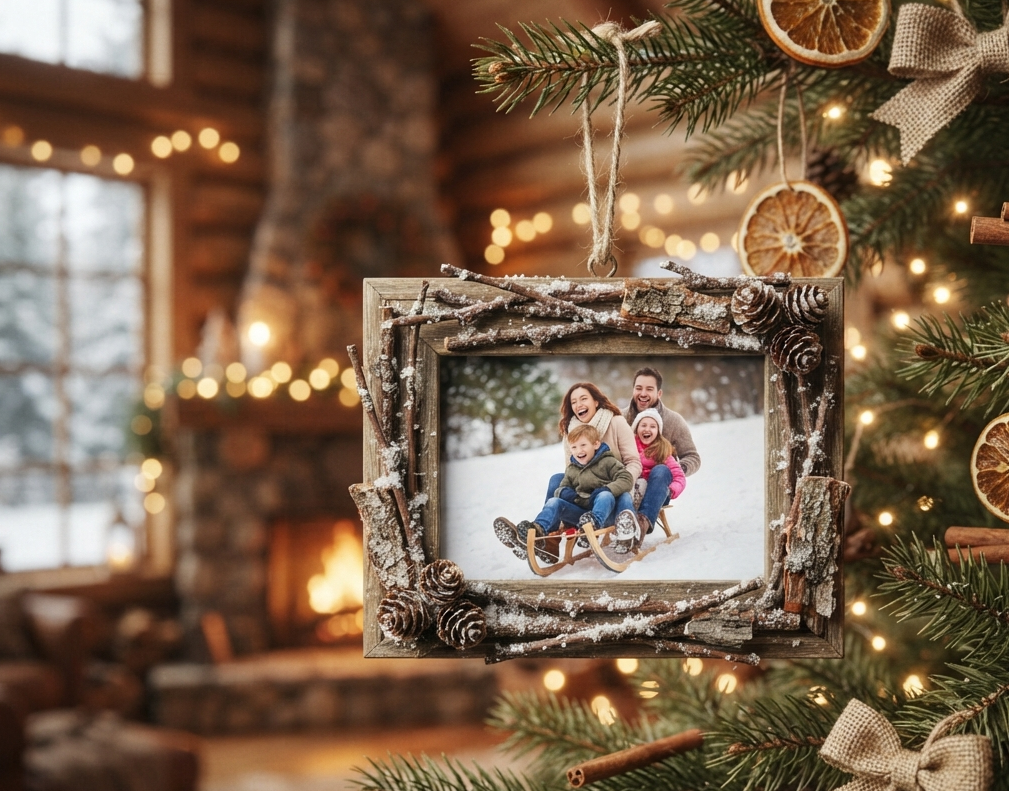
Bring the outdoors in by incorporating natural elements into your frame design. Glue small twigs, pieces of bark, or dried leaves to the edges of the frame . It’s a simple way to create a rustic, organic ornament that connects with nature. For an added touch, try adding a few miniature pinecones or acorns. This is a wonderful project for a winter nature walk, where you can gather your own materials.
Tips
- This style works best with a natural wood-colored frame
- Use a strong adhesive, like a hot glue gun, for attaching heavier items
- Seal your natural elements with a matte Mod Podge if you want to prevent them from shedding
16: Button Message Frame
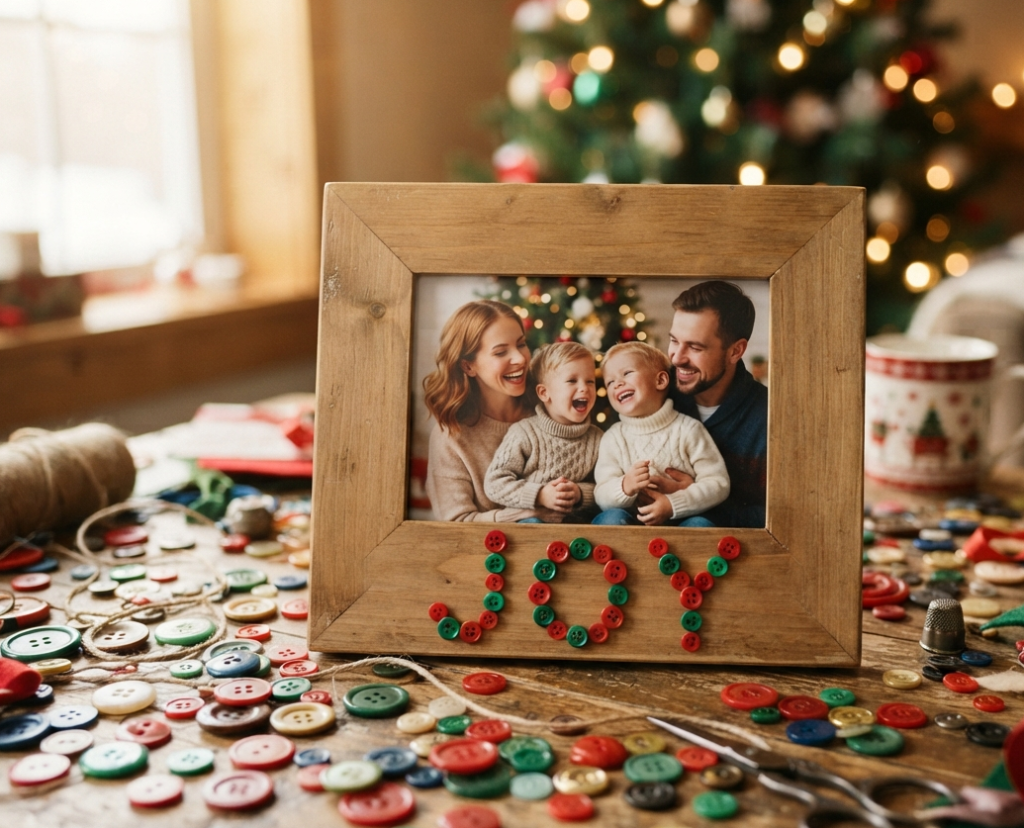
This simple and heartfelt project uses buttons to spell out a festive message on your frame . You can spell out words like “JOY,” “LOVE,” or “PEACE” using colorful buttons. It’s a wonderful way to use up a collection of spare buttons and create a cheerful, personalized decoration. You can either glue the buttons directly onto the frame or onto a piece of cardstock that you then place inside the frame.
Tips
- Sort your buttons by color before you start to make it easier to find the perfect ones
- A hot glue gun or strong craft glue works best for adhering the buttons
- This is a fantastic project to do with children who have a “button box”
17: Snowy Scene Frame
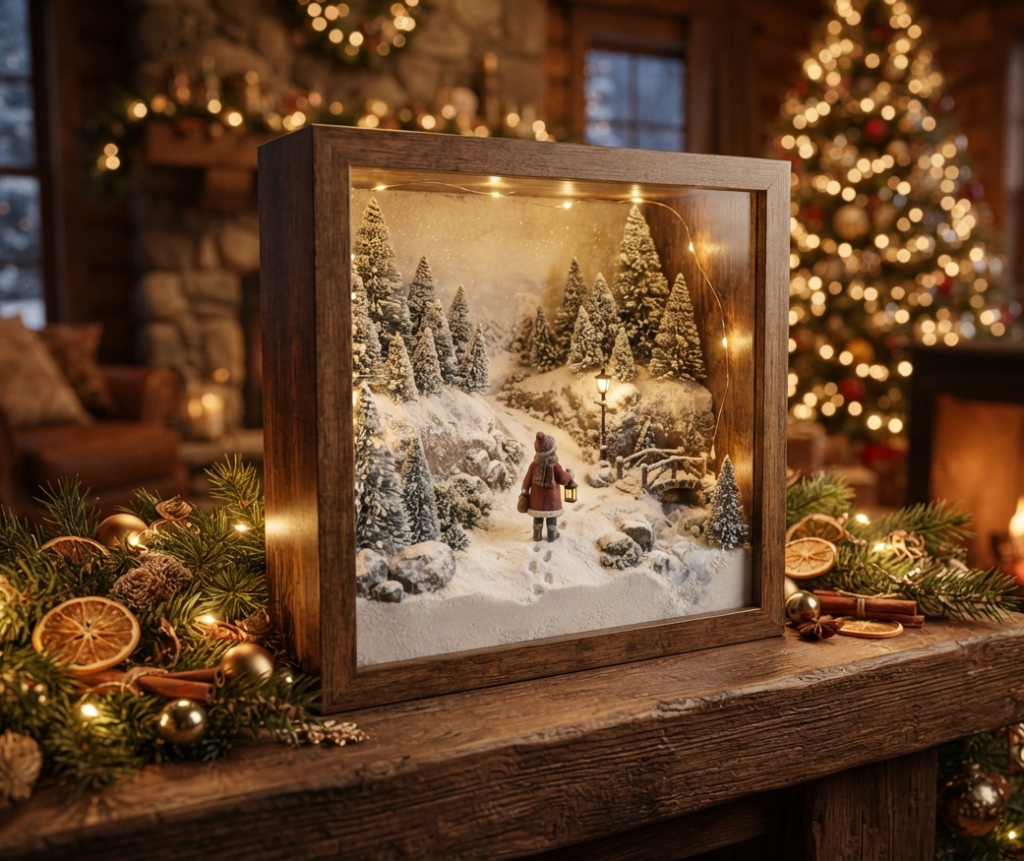
Create a miniature winter wonderland inside a picture frame. This unique project involves crafting a 3D diorama within the frame itself . Glue a snowy background, some miniature trees, and a tiny layer of fake snow to the inside of the frame. You can even add tiny figurines to create a scene. Place the frame on a mantel or shelf and watch the magic unfold .
Tips
- You can find miniature trees and figurines at craft stores
- A deep-set shadow box frame is perfect for this type of project
- This makes a beautiful centerpiece or gift
18: Metallic Accents Frame

Elevate a simple frame with a touch of glamour using metallic paint or foil accents . This modern, sophisticated look is incredibly chic. You can paint a frame with metallic gold, silver, or copper paint, or you can use a foil transfer technique to create a unique, marbled effect. It’s an easy way to give a thrifted frame a luxurious, high-end update.
Tips
- Rub-on gold wax paints are a simple, mess-free way to get a metallic finish
- Metallic gold frames are a classic choice that adds instant elegance
- You can also add metallic studs or rhinestones for a more glam look
19: Personalized Felt Frames
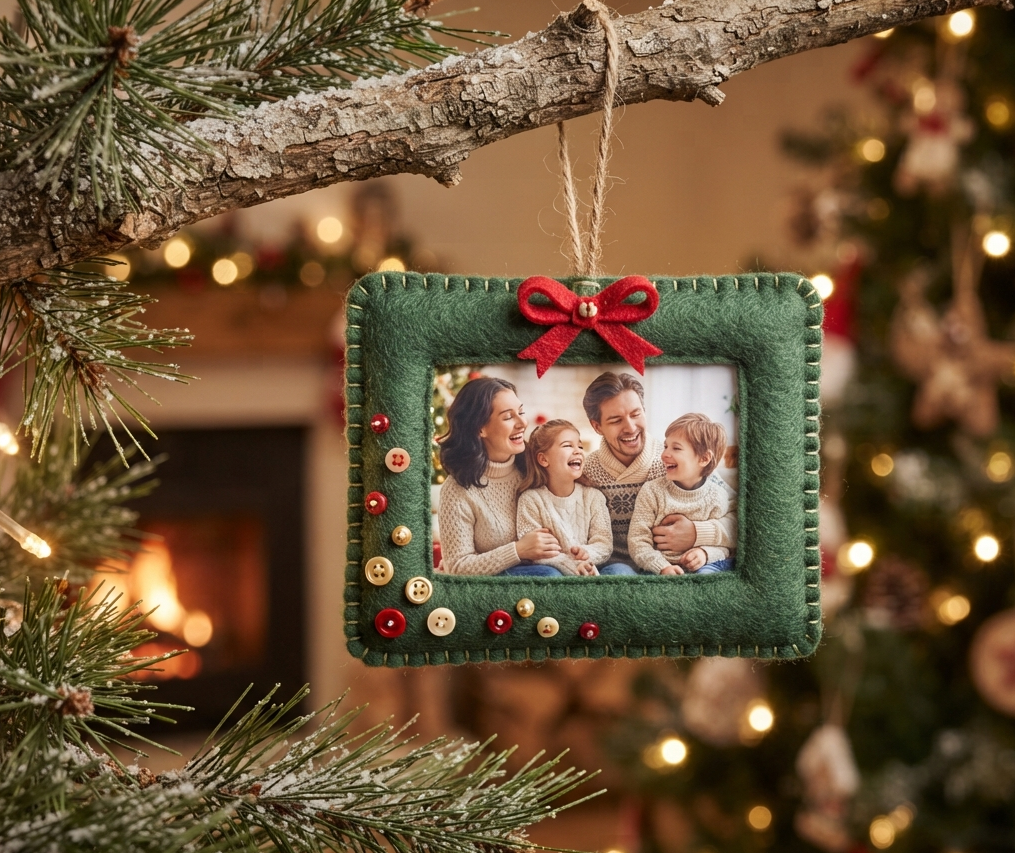
Felt is a wonderfully forgiving material for crafting. You can create a soft, cozy felt picture frame that’s perfect for a child’s bedroom or a cozy cabin-style tree. Cut two identical shapes from felt, cut a window in the center of one, and glue them together around a photo . Then, decorate the front with felt buttons, sequins, or hand-sewn details . A loop of ribbon attached to the top creates the hanger.
Tips
- Felt comes in a wide range of colors, making it easy to match your decor
- It’s a great no-glue, no-mess option, as you can sew the pieces together
- This is a wonderful texture to contrast with shiny ornaments
Conclusion
Your Christmas tree deserves to be a reflection of your family’s story, and these 19 DIY picture frame ideas offer a beautiful way to make that happen. Whether you’re drawn to the elegance of vintage gold frames, the rustic charm of wood slices, or the playful whimsy of popsicle sticks, there’s a project here for every skill level and style. Each frame becomes a small, tangible capsule of a memory, a moment to be cherished every holiday season. So gather your photos, your paints, and your creativity, and start crafting the personalized Christmas of your dreams.
FAQs
What kind of photos work best for DIY picture frame ornaments?
High-quality prints are essential. For a nostalgic feel, try sepia or black-and-white photos . Modern, bright photos also look wonderful. You can even use printed quotes, lyrics, or vintage artwork for a unique look .
Can I make a picture frame ornament without a pre-made frame?
Absolutely! You can create frames from popsicle sticks, cardboard, foam board, or even wood slices . These are often more affordable and customizable than store-bought frames.
What’s the best way to hang an ornament made from a picture frame?
The easiest method is to glue a ribbon loop to the back of the frame. For heavier frames, you might need to attach a small eye hook or drill a small hole . For frames without a pre-drilled hole, you can tie ribbon around the frame itself.
How do I make my DIY ornament last for years?
Seal your work! For painted or glittered frames, a coat of clear sealant or Mod Podge will protect the finish and prevent glitter from shedding . Store your finished ornaments in a sturdy box with tissue paper or bubble wrap to prevent damage .
Are these DIY frames suitable as gifts?
Yes! These ornaments make incredibly thoughtful and personalized gifts . Pair a framed photo of a shared memory with a heartfelt note to create a gift that will be treasured for years to come.