13 Vintage DIY Christmas Decor Ideas
There’s something magical about a vintage Christmas. Think chipped paint, mercury glass, popcorn garlands, and ornaments that look like they’ve been passed down for generations. But authentic vintage decor can be expensive and hard to find. The good news? You can create that same nostalgic, cozy holiday atmosphere yourself without spending a fortune.
In this guide, you’ll find 13 simple vintage DIY Christmas decor ideas that blend old-world charm with modern practicality. From handmade ornaments to repurposed antique finds, each project is designed to be fun, affordable, and stunning. Let’s turn your home into a holiday postcard from the past.
1: Vintage Paper Star Lanterns
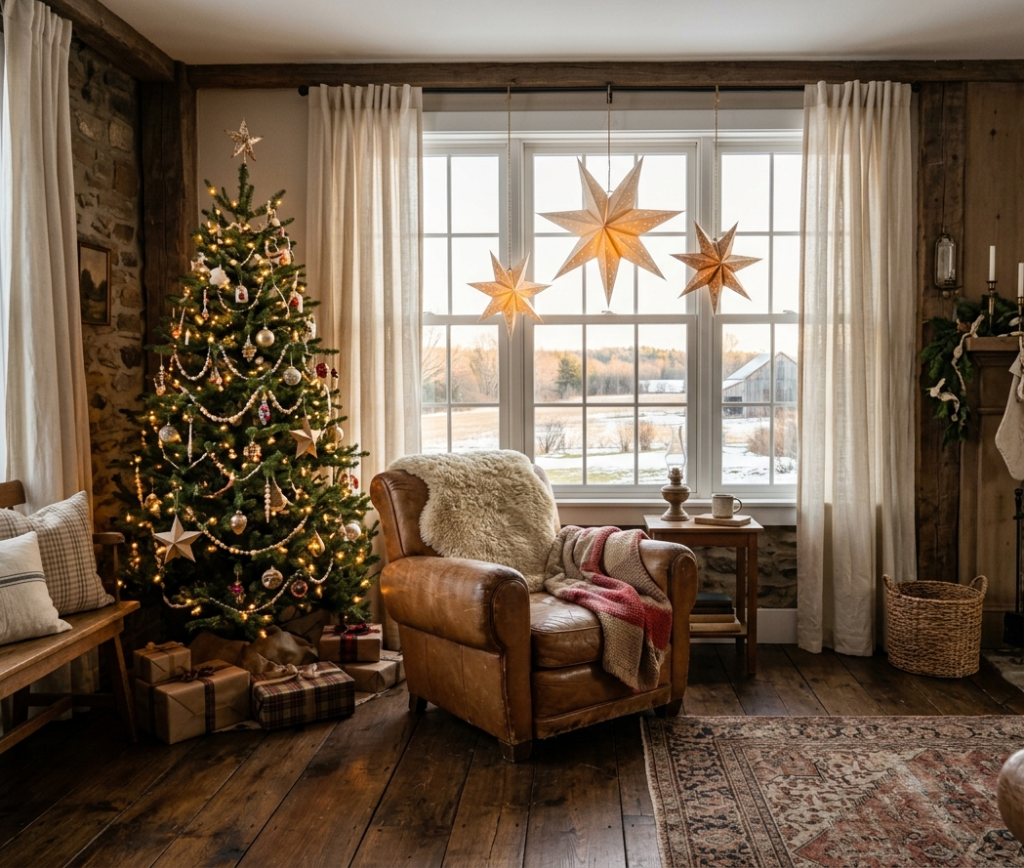
Classic folded paper stars (also known as German stars or Froebel stars) bring instant old-world charm to any room. Traditionally made from paper strips, these lanterns look beautiful hanging in windows, on the tree, or above a dining table. They cast soft, nostalgic shadows when lit from behind.
You can make them using antique-style scrapbook paper, old book pages, or even sheet music for a truly vintage feel. Hang them with twine or thin jute rope. Group several together at different heights for a dramatic, ethereal effect that costs almost nothing.
Tips
- Use tea-stained paper for an aged, yellowed look
- Add a small battery-operated tea light inside for a warm glow
- Spray lightly with matte clear coat to help them last for years
2: Bleached Pinecone Garland

Pinecones collected from your backyard can transform into elegant vintage decor with one simple trick: bleaching. When you soak pinecones in a diluted bleach solution, they turn a soft, driftwood gray-beige that looks like it’s been sitting in an attic for 50 years.
String them onto natural jute twine, alternating with dried orange slices, cinnamon sticks, or wooden beads. This garland looks perfect draped across a mantel, wrapped around a staircase railing, or laid down the center of a farmhouse table. The neutral, muted tones pair beautifully with both traditional red-and-green and more subdued vintage palettes.
Tips
- Let pinecones dry for 48 hours before stringing
- Add tiny brass bells every few inches for sound and shine
- Seal with a matte spray to prevent shedding
3: Salt Dough Ornaments with Botanical Prints

Before plastic ornaments, families made salt dough decorations by hand. This inexpensive, non-toxic recipe (flour, salt, water) creates ornaments that look authentically old especially when you press real herbs or leaves into the dough before baking.
After baking and cooling, paint them in muted colors like chalky white, sage green, or dusty rose. Then use a fine-tip marker to trace the botanical veins. Hang with twine. These ornaments look stunning on a tree, tied to gift packages, or dangling from cabinet knobs. They also make heartfelt handmade gifts.
Tips
- Use rosemary, lavender, or fern leaves for best impressions
- Bake at 200°F for 2-3 hours until completely hard
- Seal with matte Mod Podge to prevent moisture damage
4: Upcycled Sweater Stockings

That old wool sweater with a small hole or faded color is perfect for vintage Christmas stockings. Wool felt naturally has a timeworn look, especially in cream, heather gray, or deep burgundy. Cut a stocking shape using a free template, sew the edges (by hand or machine), and add a fabric cuff from an old flannel shirt.
For extra vintage charm, embroider initials using a simple backstitch or sew on a pearl button from Grandma’s button tin. These stockings look wonderful hanging from a mantel or staircase, and they’re soft, warm, and completely unique.
Tips
- Felt the sweater first by washing in hot water and drying on high
- Use a button or small brooch to hide any remaining stains
- Line with a thin cotton fabric to prevent stretching
5: Mercury Glass-Look Votives

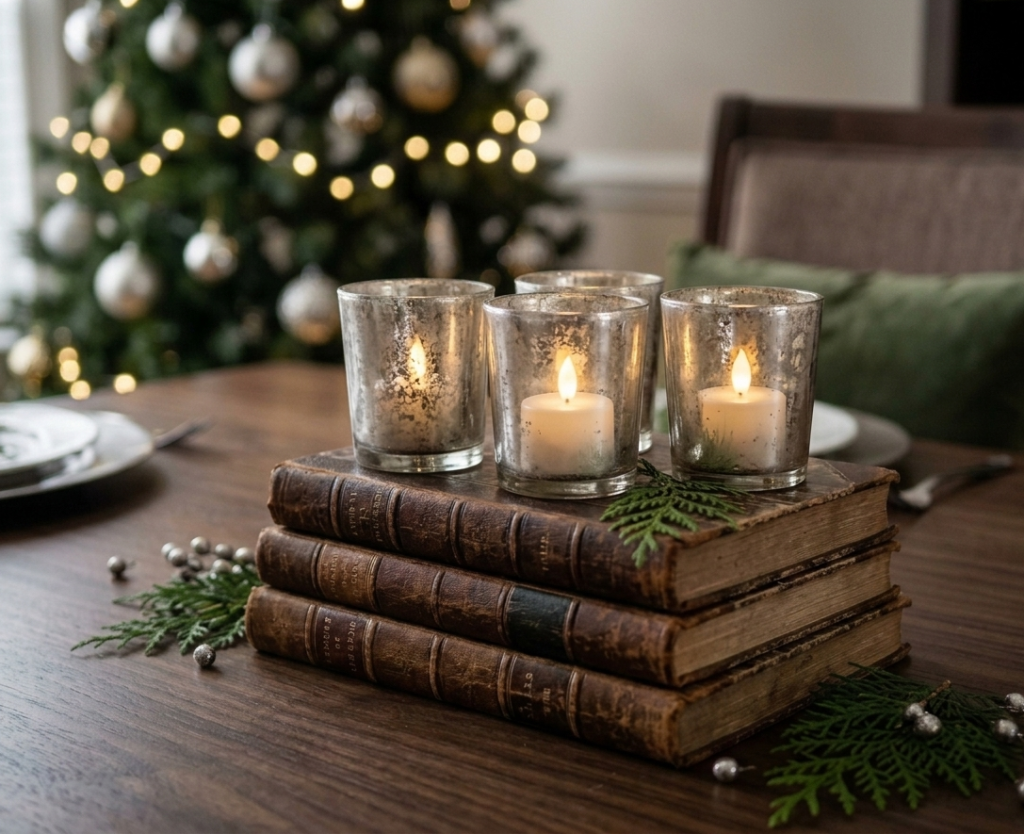
Real mercury glass is expensive and fragile, but you can replicate its iridescent, slightly crazed finish using spray adhesive and silver leaf (or even tinfoil and vinegar). Start with clear glass votives or thrifted vases. Apply a thin layer of spray adhesive, then dab on crumpled silver leaf or foil. Mist lightly with a vinegar-water solution to create tiny tarnish spots.
The result looks exactly like antique mercury glass but at a fraction of the cost. Group several together on a tray with tapered candles, or place a single votive on a stack of old books. The soft, reflective surface catches candlelight beautifully.
Tips
- Use a hairdryer on low heat to speed up the tarnishing reaction
- Apply a final coat of matte sealer to prevent flaking
- Only use battery-operated candles to avoid heat damage
6: Cinnamon Stick Candle Rings
Nothing smells like vintage Christmas quite like cinnamon. Gather cinnamon sticks of similar length and glue them vertically around a small mason jar ring or cardboard tube. Tie with twine or a strip of burlap. Then place a pillar candle in the center.
These rustic candle rings sit perfectly on mantels, side tables, or as a centerpiece. When the candle is lit, it gently warms the cinnamon sticks, releasing a subtle, sweet spice scent. They also look lovely nested around a cloche with a small ceramic deer or bottlebrush tree inside.
Tips
- Use a hot glue gun for fastest assembly
- Add a few whole star anise or dried orange peel for visual interest
- Keep away from open flame use candle holders with a raised lip
7: Framed Vintage Christmas Cards

Old Christmas cards from thrift stores or flea markets are incredibly affordable (often 10 for $1). Instead of tossing them in a box, display them as art. Choose cards with classic imagery: Victorian Santas, sleigh rides, holly wreaths, or children in vintage clothing.
Place each card in a small gold, brass, or dark wood frame. Hang them in a clustered gallery wall, lean them on a mantel, or set them on a console table. The mix of aged paper textures, handwritten notes on the back (visible if you use glass frames), and muted colors creates instant nostalgic charm.
Tips
- Look for cards dated 1950s or earlier for best style
- Use double-sided tape inside the frame to keep card flat
- Leave the back handwritten message visible for extra authenticity
8: Clove-Studded Orange Pomanders

This is one of the oldest Christmas traditions dating back to the Victorian era. Fresh oranges are studded with whole cloves in decorative patterns, then left to dry for weeks. As they dry, they shrink, harden, and release an incredible spiced orange fragrance that lasts for months.
Hang them with ribbon on the tree, place a bowlful on the coffee table, or tuck them into dresser drawers. The dark brown cloves against the orange rind look beautiful, and the scent is pure vintage Christmas. For variety, try lemons or small mandarins as well.
Tips
- Use a toothpick to pre-poke holes for easier clove insertion
- Roll finished pomander in ground cinnamon and orris root powder to preserve
- Expect drying to take 2-4 weeks in a warm, dry room
9: Burlap and Lace Tree Skirt

A store-bought tree skirt can cost 50ormore.ADIYvintage−styleversioncostsunder10. Cut a large circle from burlap (or an old grain sack), then sew or glue a layer of vintage lace or crochet doilies around the outer edge. For extra charm, add a patchwork ring of fabric scraps in muted reds, creams, and greens.
The rough texture of burlap paired with delicate lace creates that perfect “grandma’s attic” look. It hides the tree stand completely while adding a soft, romantic foundation to your Christmas tree. No sewing machine? Fabric glue works beautifully.
Tips
- Use a bedsheet to create a pattern circle first
- Iron burlap before cutting to prevent fraying
- Add small brass safety pins to attach lace without sewing
10: Transferware-Inspired Painted Plates

Transferware (blue-and-white ceramic plates from the 1800s) is highly collectible. But you can get the look using plain white plates from the dollar store and a blue oil-based paint pen. Draw simple Christmas motifs: pine branches, berries, a sleigh, or the word “Noel.”
After drawing, bake the plates at 300°F for 30 minutes to cure the paint (check your paint pen instructions first). Display them on plate stands, hang them on the wall, or use them as appetizer plates for Christmas Eve. The deep cobalt blue on creamy white feels undeniably vintage.
Tips
- Practice your design on paper first
- Use a stencil if freehand drawing feels intimidating
- Hand wash only to preserve the design
11: Scrap Fabric Rag Wreath

Don’t throw away those old flannel shirts, linen napkins, or wool remnants. Cut them into 1-inch wide strips about 6 inches long. Tie each strip tightly around a wire wreath frame (or a coat hanger bent into a circle). Fluff the strips so they cover the frame completely.
The result is a soft, textured wreath in whatever color palette you choose think dusty blues, faded reds, creams, and sage greens. Add a few felt berries, a burlap bow, or a small vintage bell. This wreath looks beautiful on the front door, but because it’s soft and unbreakable, it’s also perfect for an interior wall or above the bed.
Tips
- Mix at least 3 different fabrics for depth
- Use pinking shears to prevent fraying
- Allow 2-3 hours for a full 12-inch wreath
12: Vintage Toy Dioramas

Old toys (tiny metal cars, plastic farm animals, dollhouse furniture) get a second life inside glass cloches or apothecary jars. Arrange a miniature vintage scene: a sleigh with two reindeer, a tiny Christmas tree, or children ice skating on a mirror “pond.” Place the scene on a slice of wood or an old book.
This idea turns flea market junk into heirloom-level decor. Group three dioramas at different heights on a sideboard or mantel. The contrast between the old toys and the clean glass creates a museum-like feel that’s deeply charming and completely unique.
Tips
- Look for toys made before 1970 for best patina
- Use Museum Wax to hold items in place
- A small LED string light inside the jar adds magic
13: Bleached Branch Trees

Instead of buying a second Christmas tree, create a set of minimalist “trees” from fallen branches. Gather straight-ish branches in various heights. Remove all bark (it peels off easily when dry) or leave a few patches for texture. Soak in a diluted bleach solution for 24 hours to achieve a driftwood white.
Stand each branch upright in a small vintage vase, jar, or metal bucket. Then hang tiny ornaments from the branch tips: mini clothespins with paper stars, small brass bells, or even individual cranberries on thread. These branch trees look stunning on a mantel, grouped on a console table, or as a centerpiece.
Tips
- Drill a small hole in the bottom of each vase to insert branch
- Use sand or small pebbles to stabilize the vase
- Spray branches with clear matte sealer to prevent flaking
Conclusion
Vintage Christmas decor isn’t about buying expensive antiques. It’s about seeing the potential in simple, natural, and overlooked materials paper, pinecones, fabric scraps, branches, and thrifted finds. Each of these 13 DIY projects costs little to nothing but brings warmth, story, and authentic nostalgia into your home.
Pick one or two ideas to start this weekend. Your future self (and your holiday guests) will thank you. Which project will you try first? Let me know in the comments below!
FAQs
How can I make new decor look authentically vintage?
Tea staining, sanding edges lightly, using matte chalk paint, and adding a brown glaze or wax are the fastest methods. Also, display items in natural light and group them with truly old objects (like a vintage book or tarnished brass candlestick) to create contrast and credibility.
What are the best colors for vintage Christmas decor?
Muted, faded versions of traditional colors work best: cream instead of white, brick red instead of bright red, sage or olive instead of emerald green, and dusty blue or pale pink as accents. Add metallics like aged brass or tarnished silver, never bright gold or chrome.
Where can I find cheap supplies for vintage DIY projects?
Thrift stores, estate sales, flea markets, and Facebook Marketplace are goldmines. Look for old buttons, lace, sheet music, books with damaged covers, orphaned ornaments, fabric scraps, and glass jars. Your own backyard provides pinecones, branches, and fallen berries. Never underestimate what you already own.