20 Design Tips to Help Your Kids Be More Independent
Imagine a home where your child can pour their own cereal, grab their own shoes, and put away their toys without constant reminders. It sounds like a dream, right? But creating an environment that fosters independence isn’t about hoping your kids will figure it out it’s about designing your space to make it easy for them. When your home is set up with your child’s size and abilities in mind, you’re sending a powerful message: I trust you, and you are capable.This approach doesn’t just make your life easier (though it certainly does); it builds your child’s confidence, problem-solving skills, and self-reliance from an early age . Whether you have a toddler taking their first steps toward independence or a school-age child ready for more responsibility, these 20 design tips will help transform your home into a space that empowers your kids to do it themselves.
1: Lower Storage to Child Height
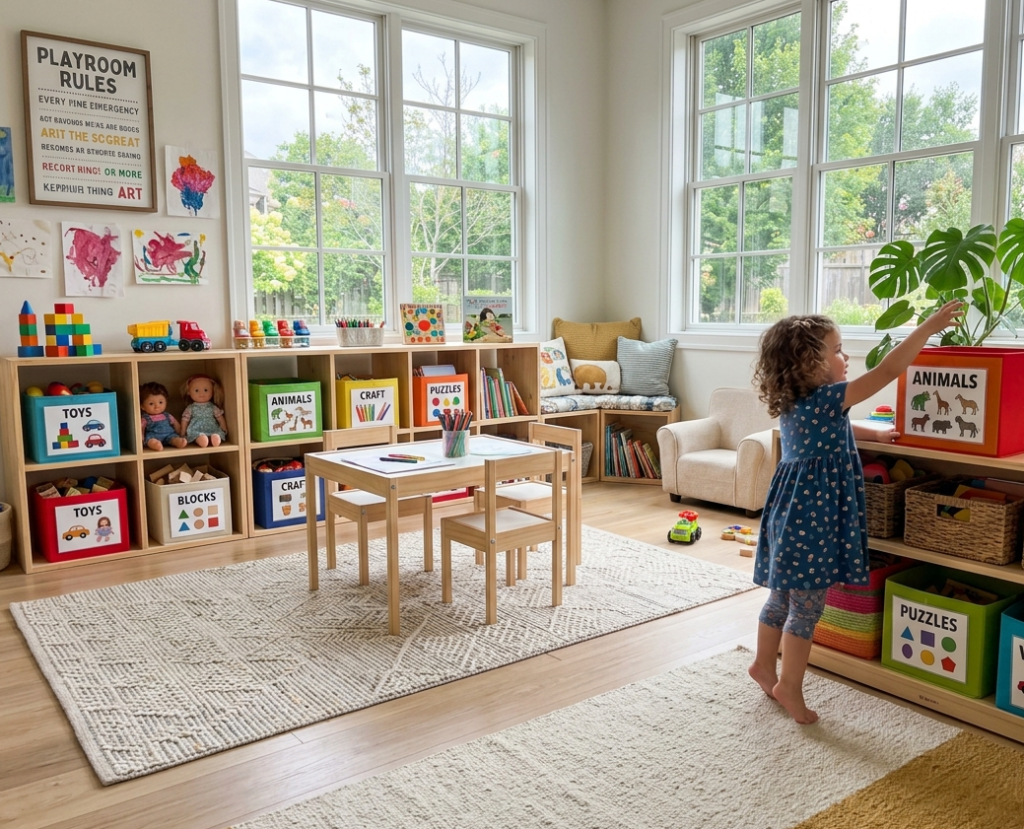
One of the most effective ways to encourage independence is making items accessible. When shelves, hooks, and baskets are at your child’s eye level, they can see their options and make choices without needing to climb or ask for help . This simple adjustment gives them control over their environment and fosters decision-making skills.
Tips
- Place frequently used items like cups, bowls, and snacks on low, open shelving
- Use the bottom two shelves of bookcases for your child’s belongings
- Keep a small step stool nearby for items that are slightly out of reach
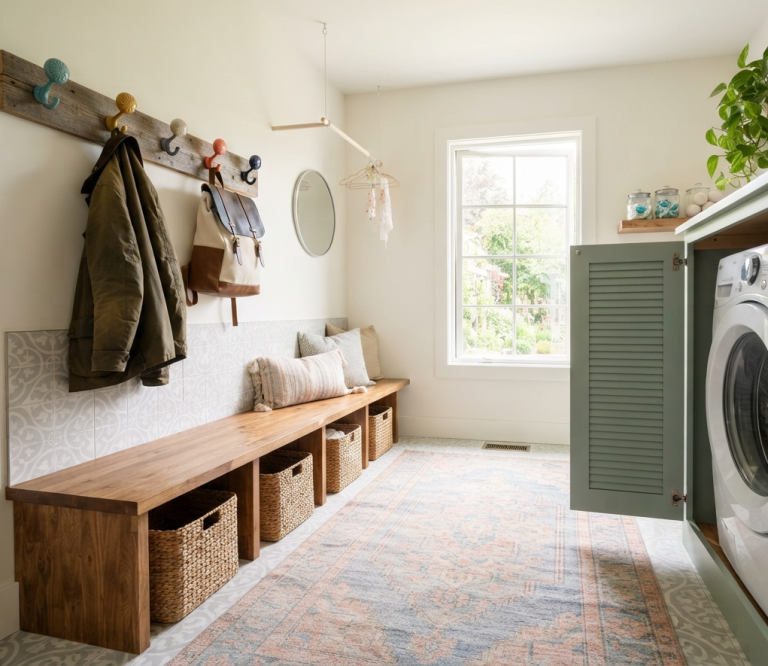
2: Create a Kid-Sized Entryway Station

Mornings can be chaotic, but a dedicated entryway station designed for little hands transforms the rush out the door into a smooth process. Install low hooks for coats and backpacks, a bench for sitting while putting on shoes, and a basket for shoes and hats . When everything has a designated spot at their level, kids can take ownership of getting ready.
Tips
- Add a small mirror at child height so they can check their appearance
- Use colorful, labeled bins for each child’s accessories
- Include a low shelf for library books or items that need to go to school
3: Design an Accessible Snack Station
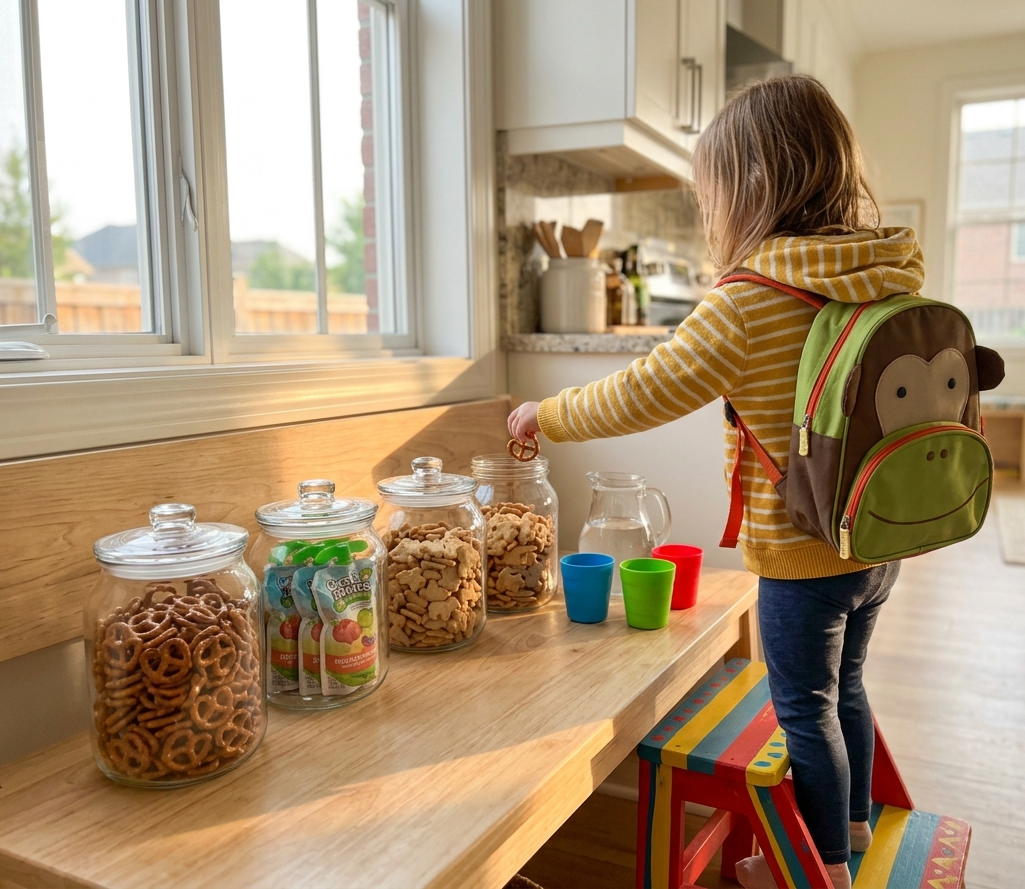
“Mom, I’m hungry!” becomes a statement of empowerment when your child can help themselves. Create a dedicated snack station in your pantry or on a low counter with pre-portioned, healthy snacks in clear containers . Include small pitchers of water and cups so they can pour their own drinks. This not only fosters independence but also teaches healthy eating habits.
Tips
- Use clear jars or bins so kids can see their options
- Pre-portion snacks into small, easy-to-open containers
- Keep a small step stool nearby for the sink or higher shelves
4: Install a Low Clothing Rod in the Closet
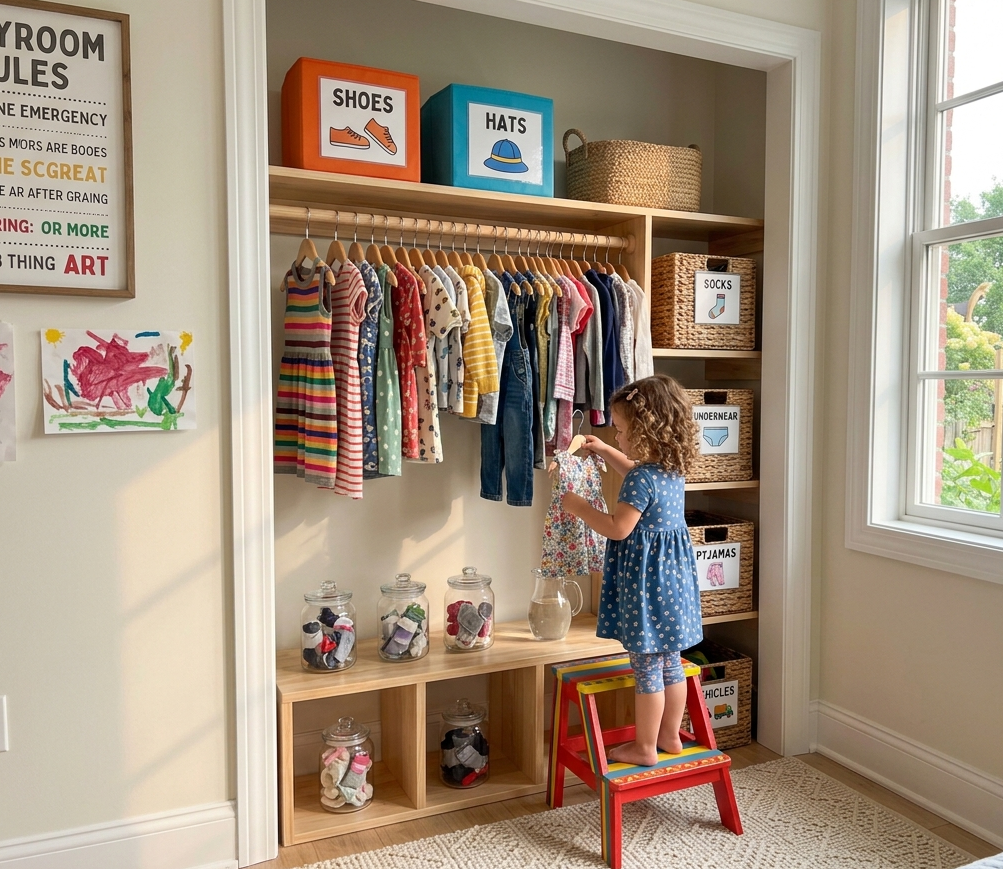
Getting dressed independently becomes much easier when kids can actually see and reach their clothes. Install a second clothing rod in their closet at a lower height, or use a garment rack designed for children . Organize clothes by outfit or type so they can make their own choices without frustration.
Tips
- Store out-of-season clothes on the higher rod to reduce overwhelm
- Use visual cues like color-coded hangers for different clothing types
- Place a small laundry hamper in the closet for dirty clothes
5: Make the Bathroom Child-Friendly
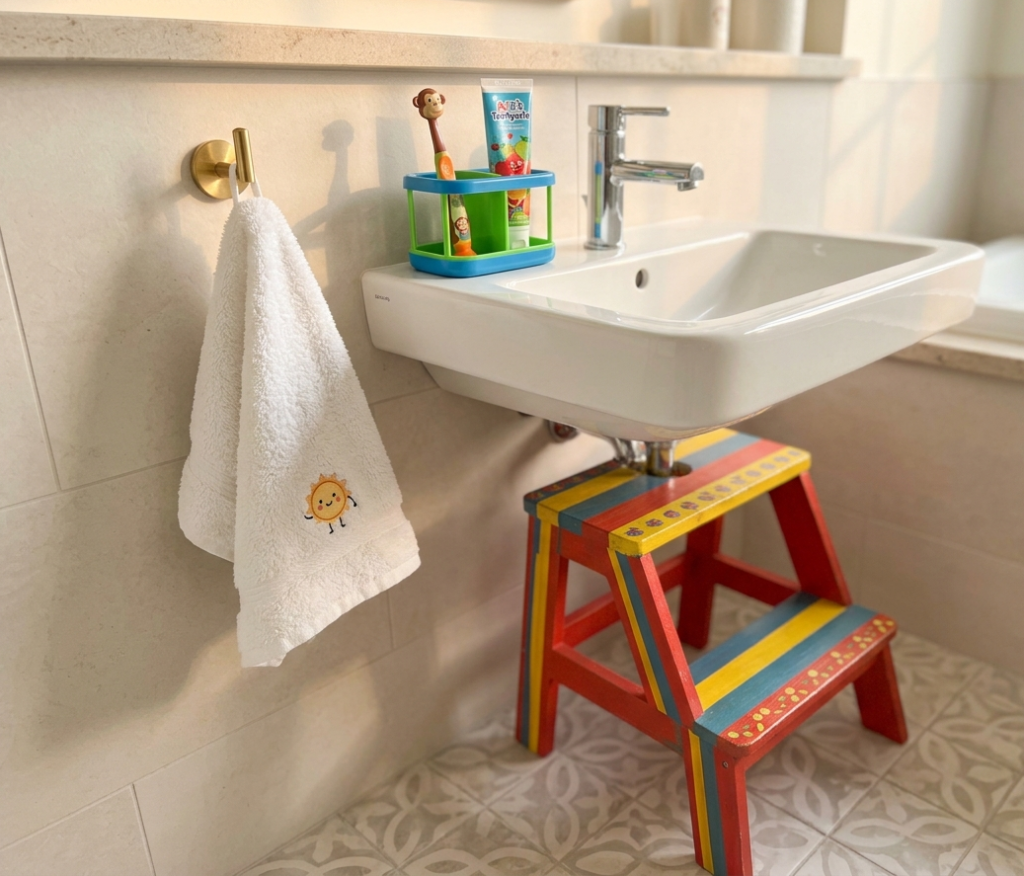
Bathrooms are often designed for adults, making tasks like brushing teeth and washing hands difficult for little ones. Add a step stool for reaching the sink, a child-sized toilet seat, and a low hook for towels . Keep soap, toothbrushes, and toothpaste in a caddy at their level. When kids can manage their own hygiene routine, they gain confidence and independence.
Tips
- Use a faucet extender to help kids reach running water
- Place a small mirror at child height for brushing teeth
- Use a suction cup soap dispenser attached to the sink at their level
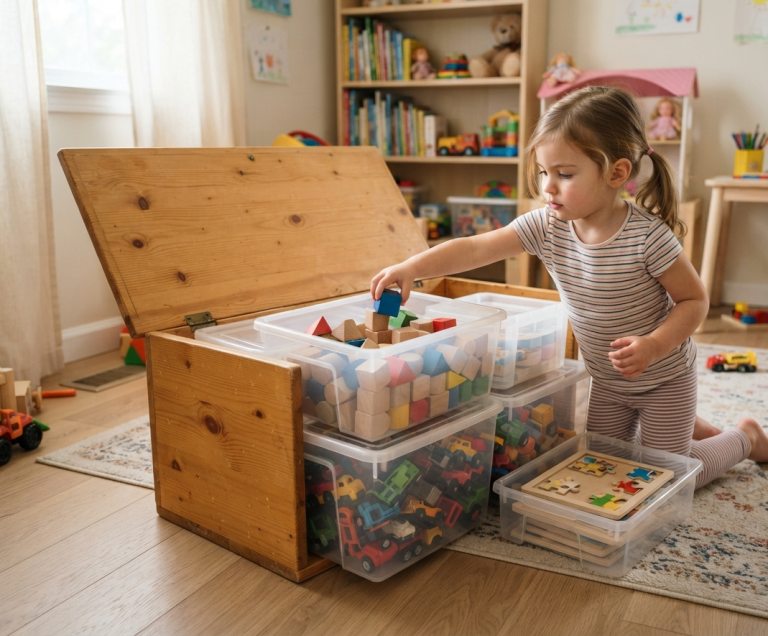
6: Use Open Bins for Easy Toy Cleanup

When toy storage is complicated, cleanup becomes a battle. Open bins and baskets without lids make it easy for kids to see their toys and put them away . Label each bin with a picture of what goes inside so even non-readers can participate in cleanup. This system turns tidying up into a manageable, visual task.
Tips
- Use lightweight bins that kids can easily carry
- Group toys by category blocks in one bin, cars in another
- Limit the number of bins to reduce overwhelm
7: Incorporate Low, Sturdy Furniture

Furniture designed for adults can be intimidating for small children. Incorporate a few child-sized pieces like a low table and chairs for art projects, a small sofa for reading, or a miniature kitchen for pretend play . When furniture is their size, kids feel capable and in control of their space.
Tips
- Choose sturdy, well-balanced pieces that won’t tip easily
- Use a low coffee table for art projects or snack time
- Repurpose an adult side table as a child’s desk with a small chair
8: Add Visual Labels Everywhere

Labels aren’t just for organization they’re a powerful tool for literacy and independence . When drawers, bins, and shelves are labeled with words and pictures, children can find what they need and put things back without asking for help. This system works for everything from toy bins to dresser drawers to pantry shelves.
Tips
- Use both words and pictures for pre-readers
- Laminate labels for durability
- Involve your child in creating labels for ownership
9: Design a Cozy Reading Nook

A dedicated reading nook encourages a love of books and independent quiet time. Create a cozy corner with soft cushions, a basket of books at their level, and good lighting . Make sure the space feels special and inviting so your child naturally gravitates toward it for solo reading time.
Tips
- Use a teepee or canopy for a magical hideaway feel
- Rotate books regularly to keep the selection fresh
- Include a small shelf or basket for library books
10: Set Up an Art Studio Station
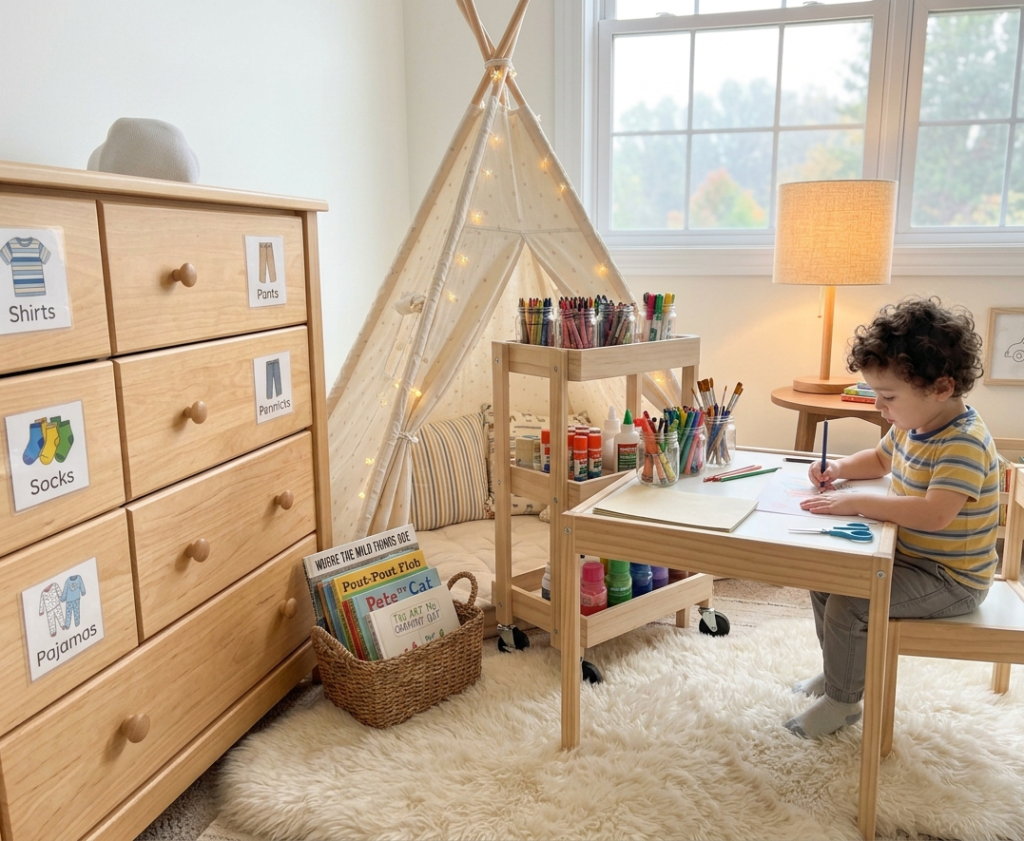
Art projects often involve a lot of setup and cleanup, which can discourage independent creativity. Set up a dedicated art station with supplies at child height paper, crayons, markers, glue, and scissors in easy-to-reach containers . Add a child-sized table and chair, and cover the area with an easy-to-clean mat. Now they can create whenever inspiration strikes.
Tips
- Use a rolling cart for art supplies so it can be moved easily
- Store washable supplies for easy cleanup
- Display finished artwork at child height for pride and motivation
11: Keep Daily Essentials in a “Morning Basket”
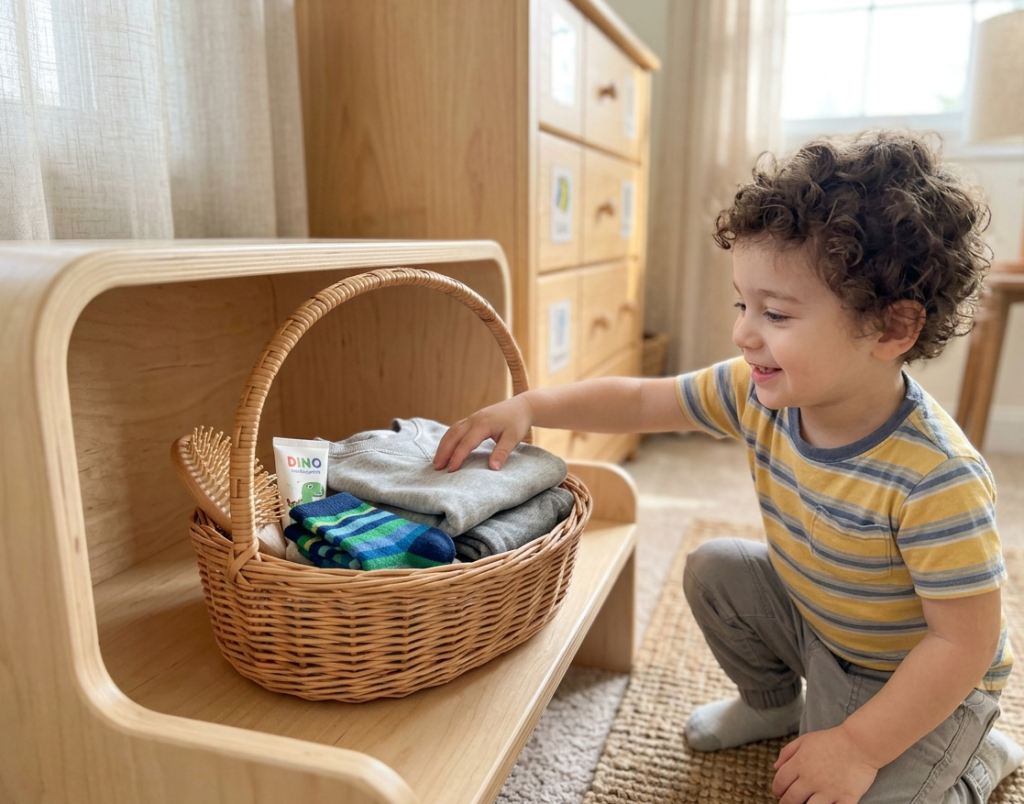
Mornings can be rushed and stressful, but a “morning basket” streamlines the routine. Place items like a brush, toothbrush, socks, and a change of clothes in a basket at your child’s level . They can grab the basket and head to the bathroom or get dressed without needing to track down multiple items.
Tips
- Customize each child’s basket with their specific items
- Prepare baskets the night before for an even smoother morning
- Include a small checklist of morning tasks
12: Install Step Stools Throughout the Home

Step stools are the unsung heroes of independent living for kids. Place them strategically wherever your child needs a little boost the bathroom sink, kitchen counter, closet, and even the bed . A sturdy, non-slip step stool gives them access to the adult-sized world on their own terms.
Tips
- Choose foldable stools that can be stored easily
- Use one with handles for toddlers to hold for stability
- Place a stool permanently in high-use areas
13: Create a “Ready-to-Go” Bag Station

Mornings are smoother when everything is packed and ready. Set up a station with hooks or cubbies for each child’s backpack, library books, water bottle, and jacket . Having a designated spot for these essentials eliminates last-minute scrambling and teaches planning and responsibility.
Tips
- Place the station near the door you use most often
- Include a small whiteboard for notes or reminders
- Pack bags the night before for an easier morning
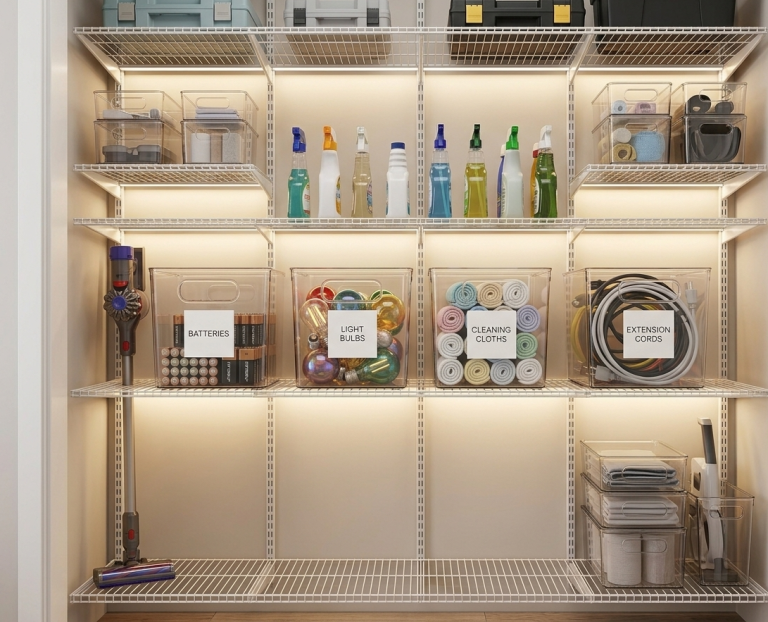
14: Use Clear Containers for Pantry Snacks

When kids can see their food options, they’re more likely to make independent choices. Transfer snacks from opaque packages to clear containers or jars placed on low shelves . This allows children to see what’s available, choose what they want, and even help themselves with minimal supervision.
Tips
- Pre-portion snacks into individual servings
- Use airtight containers to keep snacks fresh
- Place heavier containers on lower shelves for safety
15: Design a Toy Rotation System
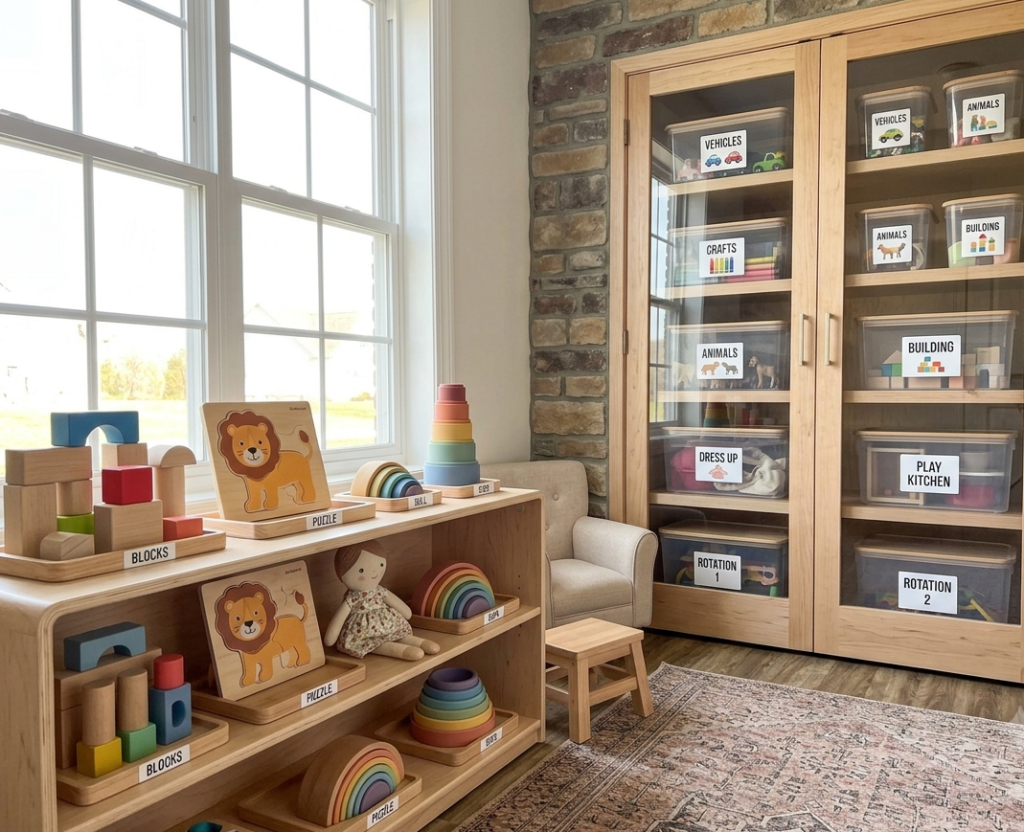
Too many toys can be overwhelming and lead to clutter and frustration. A toy rotation system keeps options fresh and manageable. Store some toys in labeled bins in the closet and swap them out every few weeks . This reduces clutter, makes cleanup easier, and keeps your child engaged with their toys.
Tips
- Keep 10–15 toys out at a time for younger children
- Rotate toys based on your child’s interests and developmental stage
- Involve your child in choosing which toys to bring out
16: Make the Bed Easy to Manage

A made bed is a small but meaningful achievement for a child. Choose lightweight bedding that’s easy for small hands to manage, and teach a simple process: smooth the sheet, pull up the blanket, and place the pillow . A quilt or comforter that doesn’t require precise hospital corners is ideal.
Tips
- Use a duvet or quilt instead of a top sheet for simplicity
- Choose a bed low to the ground so it’s easy to climb in and out
- Place the bed in a corner for a cozy, defined space
17: Add a Kid-Friendly Calendar
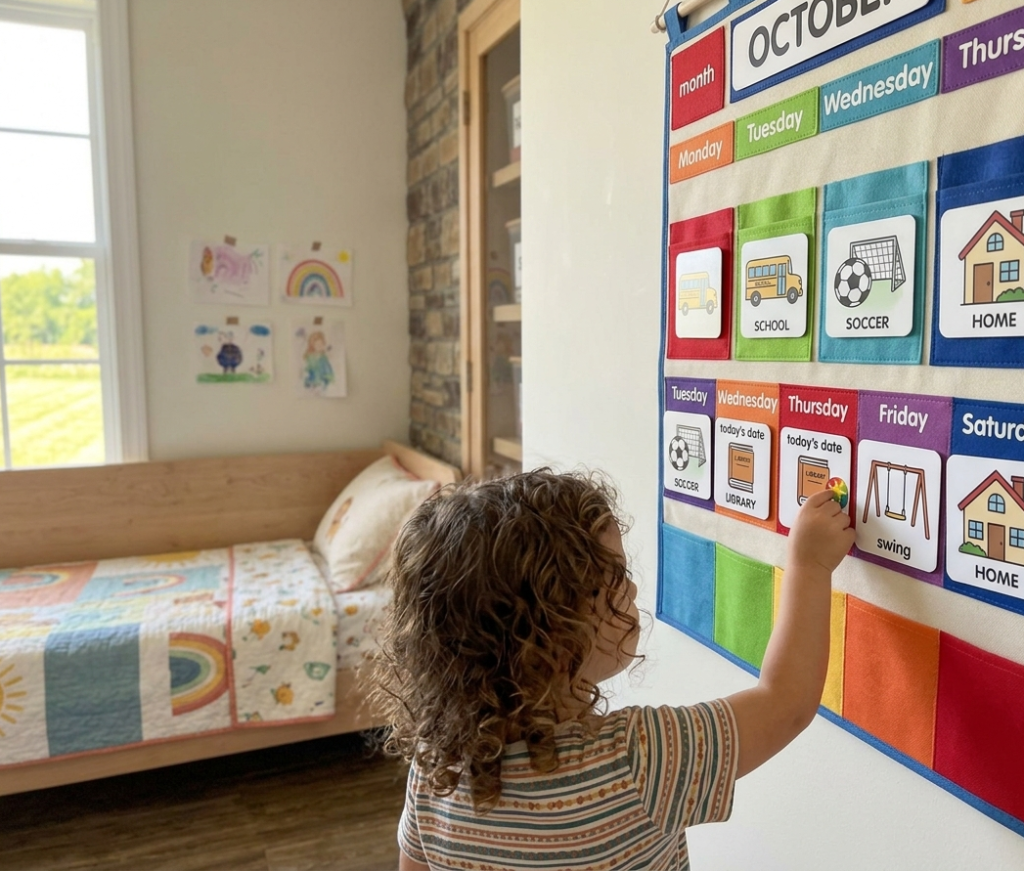
Understanding time and routines builds independence. Hang a simple, visual calendar at your child’s eye level . Use pictures or stickers for daily activities school, soccer practice, library day, and birthdays. This helps them understand their schedule and anticipate what comes next.
Tips
- Use a magnetic or dry-erase calendar for easy updates
- Include a weekly checklist of chores or routines
- Let your child add stickers or mark off completed days
18: Use a “Done” Bin for Chores
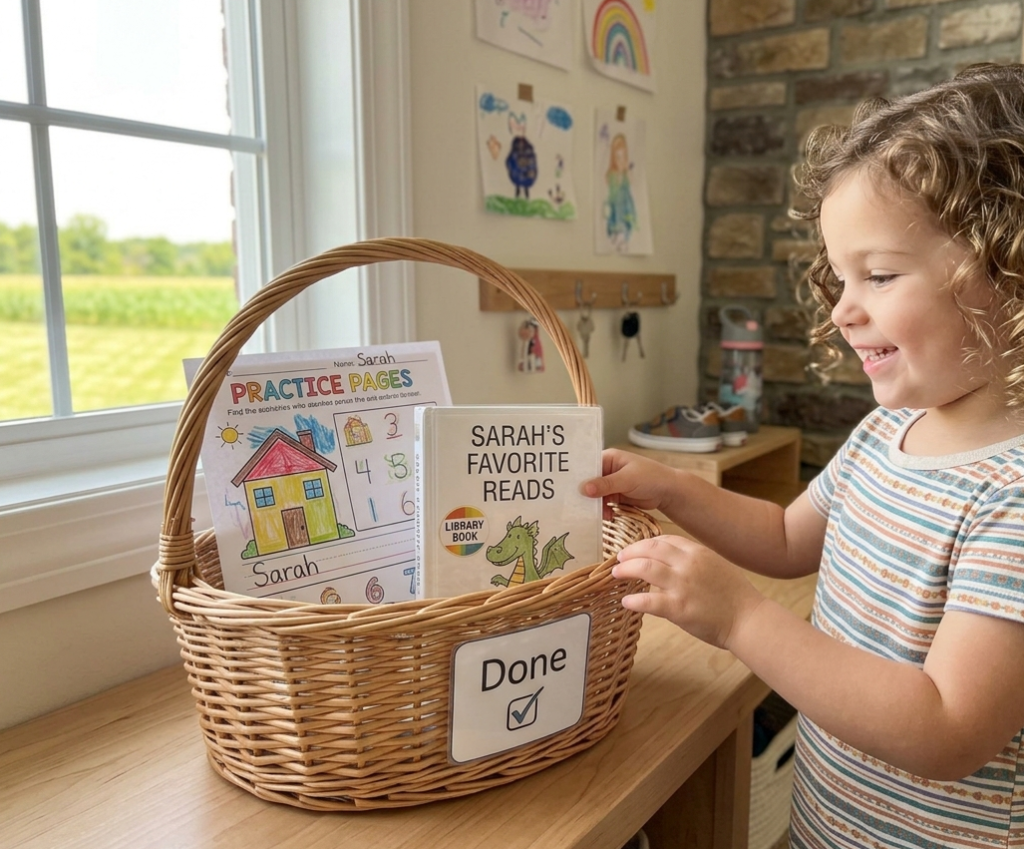
Encourage responsibility with a simple chore system. Create a “done” bin where kids can place completed tasks or belongings schoolwork, library books, or notes from school . This creates a visible, satisfying routine that teaches organization and follow-through.
Tips
- Pair the bin with a checklist of daily responsibilities
- Check the “done” bin together each day to celebrate accomplishments
- Customize with your child’s name for ownership
19: Provide a Self-Care Station
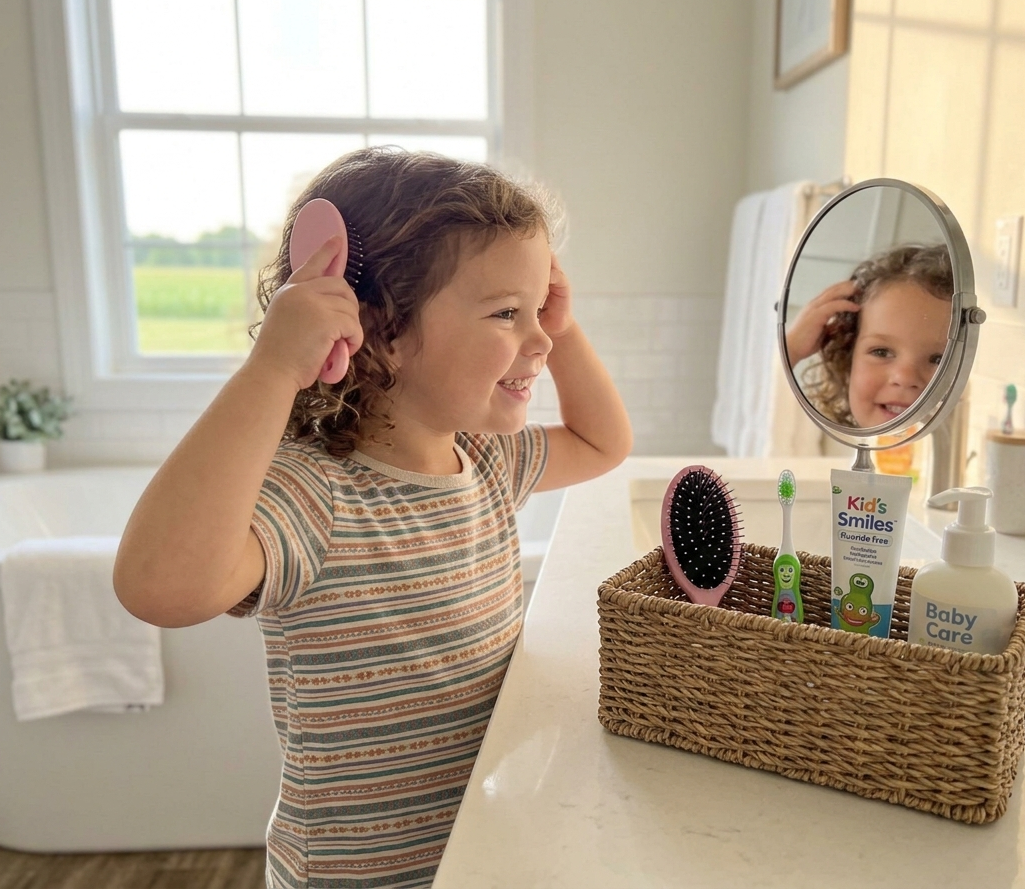
Empower your kids to manage their own self-care with a dedicated station. In the bathroom, keep hairbrushes, toothbrushes, and lotion in a caddy at their level . In the bedroom, place a small basket with sunscreen, lip balm, and a small mirror. Taking ownership of self-care builds lifelong habits.
Tips
- Use child-sized or easy-to-grip bottles
- Choose unscented or gentle products for sensitive skin
- Rotate items seasonally add sunscreen in summer, lotion in winter
20: Celebrate Their Space With Personalization
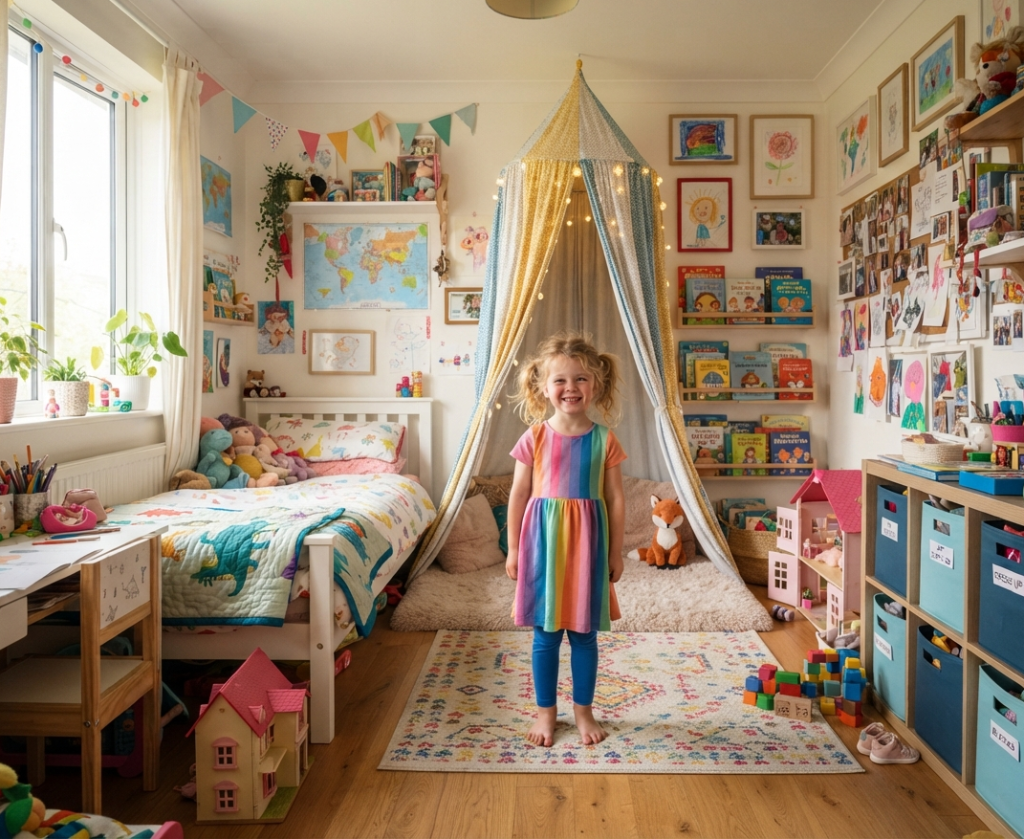
When kids have ownership over their environment, they treat it with more respect and care. Let them choose decor, artwork, and organizational systems that reflect their personality . Whether it’s a favorite color of bin or their own art on the walls, personalization makes the space feel like theirs—and encourages them to maintain it.
Tips
- Frame your child’s artwork and hang it at their eye level
- Let them choose a theme for their room or play area
- Involve them in arranging their own shelves or toy bins
Conclusion
Designing a home that fosters independence isn’t about expensive renovations or complicated systems it’s about thoughtful, simple changes that put your child’s abilities first. From lowering storage to creating kid-sized stations, each of these 20 tips empowers your little ones to do more for themselves. And the benefits go beyond a tidy home. When children can pour their own drinks, choose their own clothes, and clean up their own toys, they’re building confidence, problem-solving skills, and a sense of responsibility that will serve them for a lifetime . Start with just one or two changes this week and watch your child’s independence blossom. Which tip will you try first?
FAQs
At what age can children start being independent at home?
Independence is a gradual process. Toddlers can start with simple tasks like putting toys in a bin or choosing between two snacks. School-age children can handle more complex routines like packing their backpack or making their bed . Tailor expectations to your child’s developmental stage.
How do I keep my child motivated to stay independent?
Celebrate small wins and offer specific praise “You put your shoes in the basket all by yourself!” Visual charts, stickers, and gentle reminders can also help maintain motivation. The goal is to build intrinsic motivation over time, so start with small, achievable tasks.
What if my child makes a mistake or a mess?
Mistakes are part of learning! Instead of correcting or taking over, guide your child gently. Ask questions like, “What could you do differently next time?” This builds problem-solving skills and resilience without discouraging their attempts.
How much should I childproof my home?
Childproofing and independence go hand in hand. Secure heavy furniture, cover outlets, and lock away hazards so your child can explore safely. At the same time, create accessible zones where they can practice skills low shelves, child-sized furniture, and step stools .
Can independent design tips work for children with special needs?
Absolutely! Many of these principles visual labels, accessible storage, and predictable routines are especially beneficial for children with special needs. Tailor the approach to your child’s unique abilities and consult an occupational therapist for personalized strategies.